Documentation / PAC Attacks
CustomAddons
Custom Add-ons & CVE Management
Bring your own attack scripts or ZAP add-ons into PAC. Prancer pulls them from your Git repo at scan time, so you can version, code-review, and reuse them across applications.
Tip: custom add-ons shine when you have business-logic or zero-day tests that aren't in any off-the-shelf scanner. For everything else, start with the built-in PAC attacks.
Before you start
- A Git repo to hold the add-on script and metadata.
- A Git access token with read access to that repo. → GitHub PAT instructions.
- A working PAC config from the PAC Wizard.
- An entry in your Vault / Key Vault for the Git token.
Step 1 — Lay out the Git repo
Each add-on lives in its own folder with two files:
- The add-on file (e.g.
log4j-alpha.zap). - A
metadata.yamldescribing it.
Git repo
└── Log4Shell
    ├── log4j-alpha.zap
    └── metadata.yaml
Example metadata.yaml
Name: log4j
Type: addon
Engine: Java
Description: Apache Log4j2 versions 2.0-beta7 through 2.17.0 (excluding 2.3.2 and 2.12.4)
Charset: UTF-8
Dependency:
  Addons:
    - oast
    - network
→ Full reference: metadata file.
Step 2 — Create the PAC application
Use the PAC Wizard to create a baseline PAC file. You'll add the custom-attack section in Step 5.
Collection: Prancer_Collection
ConnectionName: prancer_connector
CloudType: azure
ApplicatioName: JuiceShopCustomAttack
RiskLevel: standard
Compliance: [CIS, CSA-CCM]
ApplicationType: WebScan
Schedule: onetime
Target: https://prancersampleapp01.eastus2.cloudapp.azure.com:9000/
WebScan:
  AjaxSpider: false
Scanner:
  Cloud:
    Platform:
      Azure:
        ContainerInstance:
          AfterRun: delete
          NewContainerInstance:
            External:
              SubscriptionId: a6941677-4c37-42fb-960c-dad8f25060a3
              ResourceGp: farshid-test
              Region: eastus2
              ContainerGroupName: prancer-scanner-group
              ContainerName: prancer-pentest-instance
              ResourceName: prancer-instances-rsd-logshell
AuthenticationMethod: noAuthentication
Step 3 — Create and upload a Git connector
The Git connector tells Prancer how to clone your repo.
cve_connector.json
{
  "branchName": "openssl",
  "companyName": "prancer",
  "fileType": "structure",
  "gitProvider": "https://github.com/prancer-io/prancer-custom-attack.git",
  "httpsAccessToken": "secret-git-key",
  "private": true,
  "type": "filesystem"
}
| Field | Description |
| ------- | ------------- |
| branchName | Repo branch holding the scripts. |
| companyName | Your company name. |
| gitProvider | HTTPS clone URL. |
| httpsAccessToken | Vault key name holding the Git token. |
| private | true for private repos. |
| type | filesystem. |
Note:privatedefaults totruefor custom add-ons but is auto-disabled if the access token is missing — your scan will fail if you forget the token.
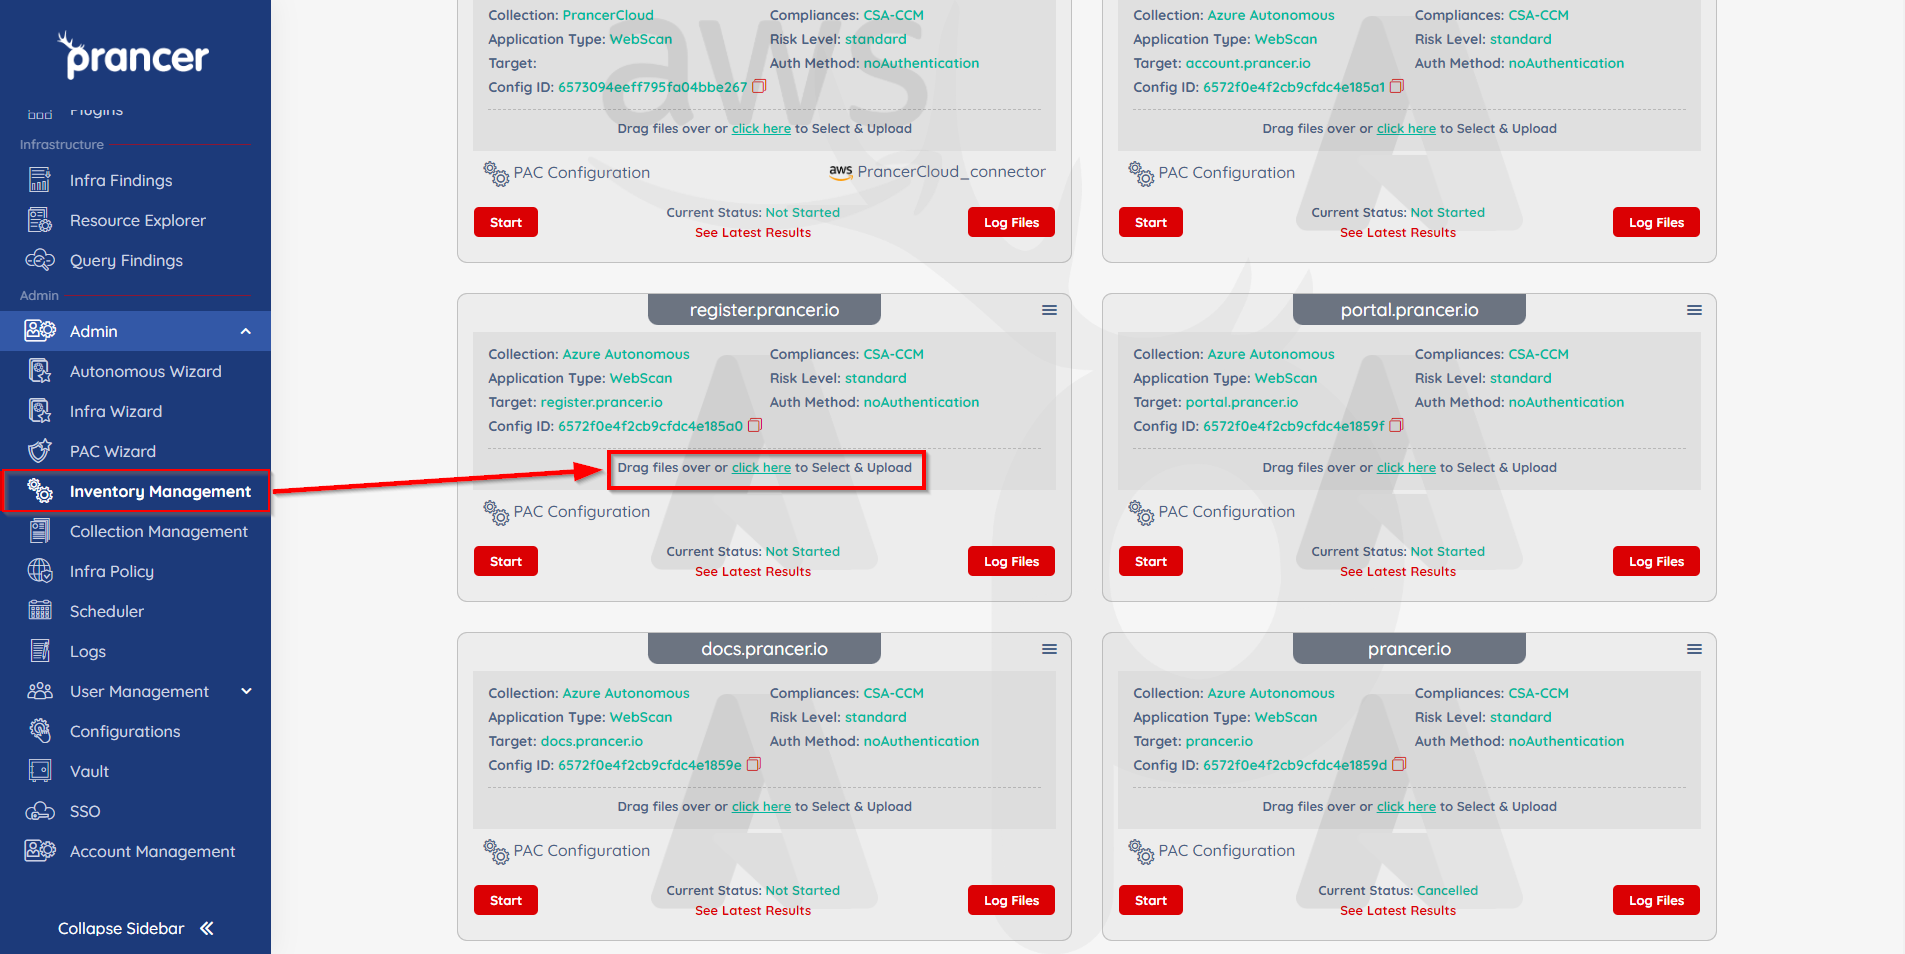
Drag-and-drop the JSON into your collection, or upload it from inside the collection.
Step 4 — Store the Git token in the Vault
Generate a Personal Access Token with these permissions:
repo: Full control of private repositories
read: user (read all user profile data)
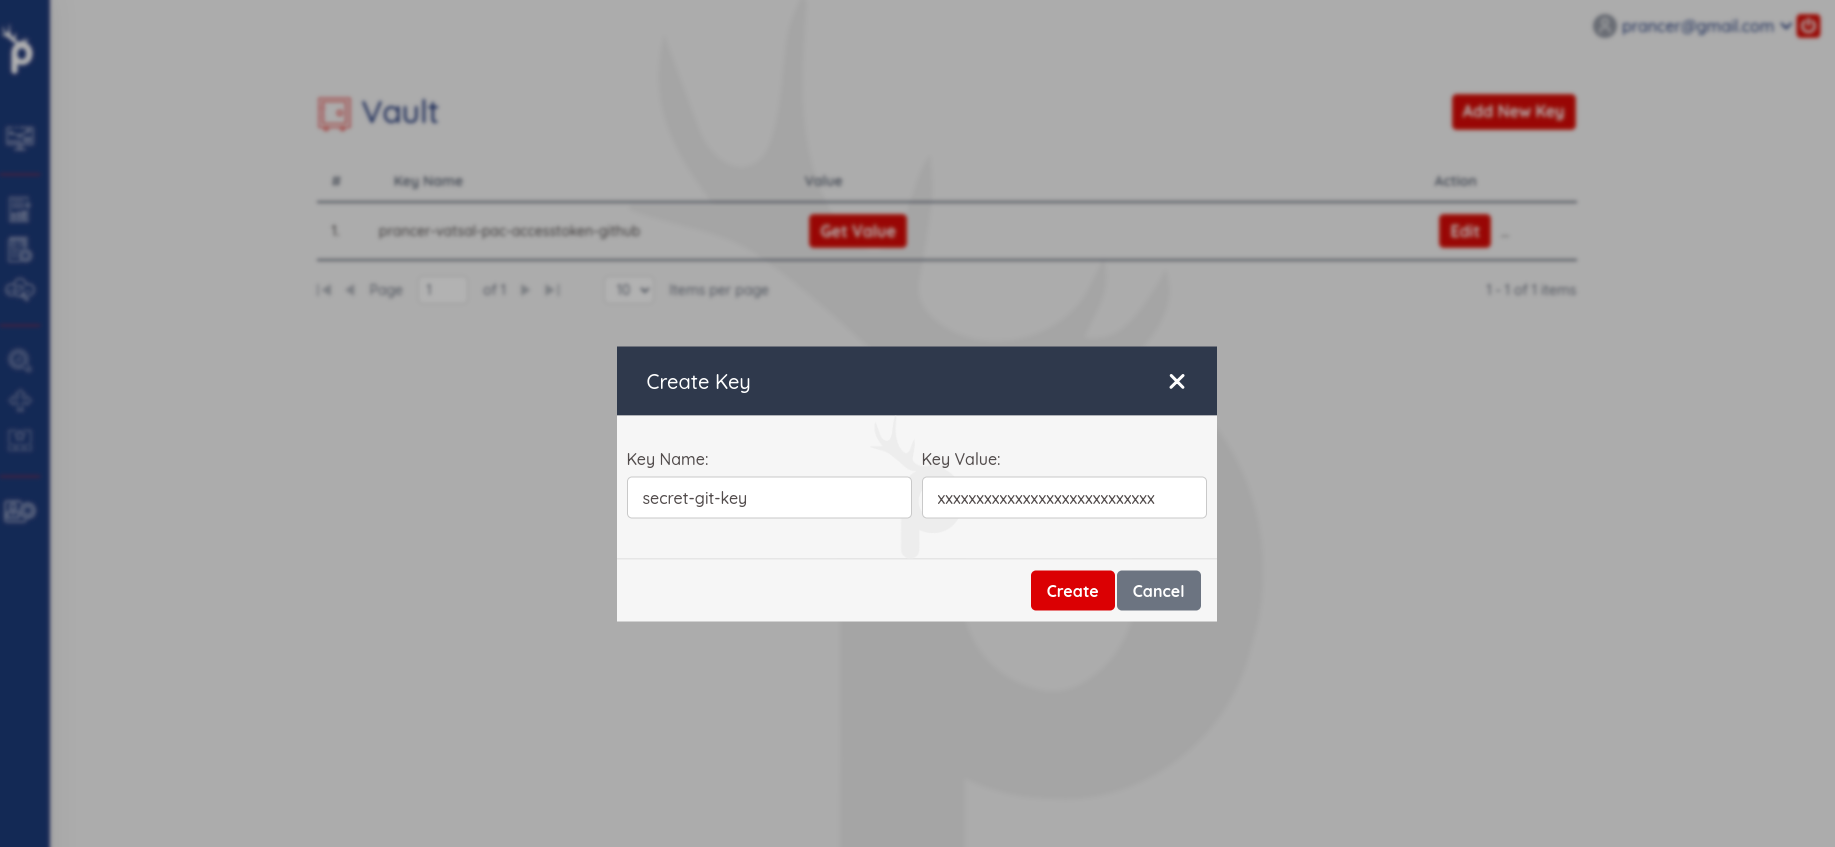
Create a Vault entry where:
- Key Name = the
httpsAccessTokenvalue from the connector (e.g.secret-git-key). - Key Value = the generated PAT.
Warning: never commit the PAT to Git. The Vault is the only place this should live.
Step 5 — Add the CVE block to the PAC file
Open the PAC config from PAC Management.

Add:
CVE:
  - Path:
      Include:
        - log4shell
        - opensslCertificate
      Exclude: []
    Connector: cve_connector
    Metadata: ""
    Parameters: {}
    Secrets: {}
| Field | Description |
| ------- | ------------- |
| Connector | Git connector name from Step 3. |
| Path.Include | Regex patterns of script paths to include. |
| Path.Exclude | Regex patterns to skip. |
Final PAC file
Collection: Prancer_Collection
ConnectionName: prancer_connector
CloudType: azure
ApplicatioName: JuiceShopCustomAttack
RiskLevel: standard
Compliance: [CIS, CSA-CCM]
ApplicationType: WebScan
Schedule: onetime
Target: https://prancersampleapp01.eastus2.cloudapp.azure.com:9000/
WebScan:
  AjaxSpider: false
CVE:
  - Path:
      Include:
        - log4shell
      Exclude: []
    Connector: cve_connector
    Metadata: ""
    Parameters: {}
    Secrets: {}
Scanner:
  Cloud:
    Platform:
      Azure:
        ContainerInstance:
          AfterRun: delete
          NewContainerInstance:
            External:
              SubscriptionId: a6941677-4c37-42fb-960c-dad8f25060a3
              ResourceGp: farshid-test
              Region: eastus2
              ContainerGroupName: prancer-scanner-group
              ContainerName: prancer-pentest-instance
              ResourceName: prancer-instances-rsd-logshell
AuthenticationMethod: noAuthentication
Step 6 — Run the pentest
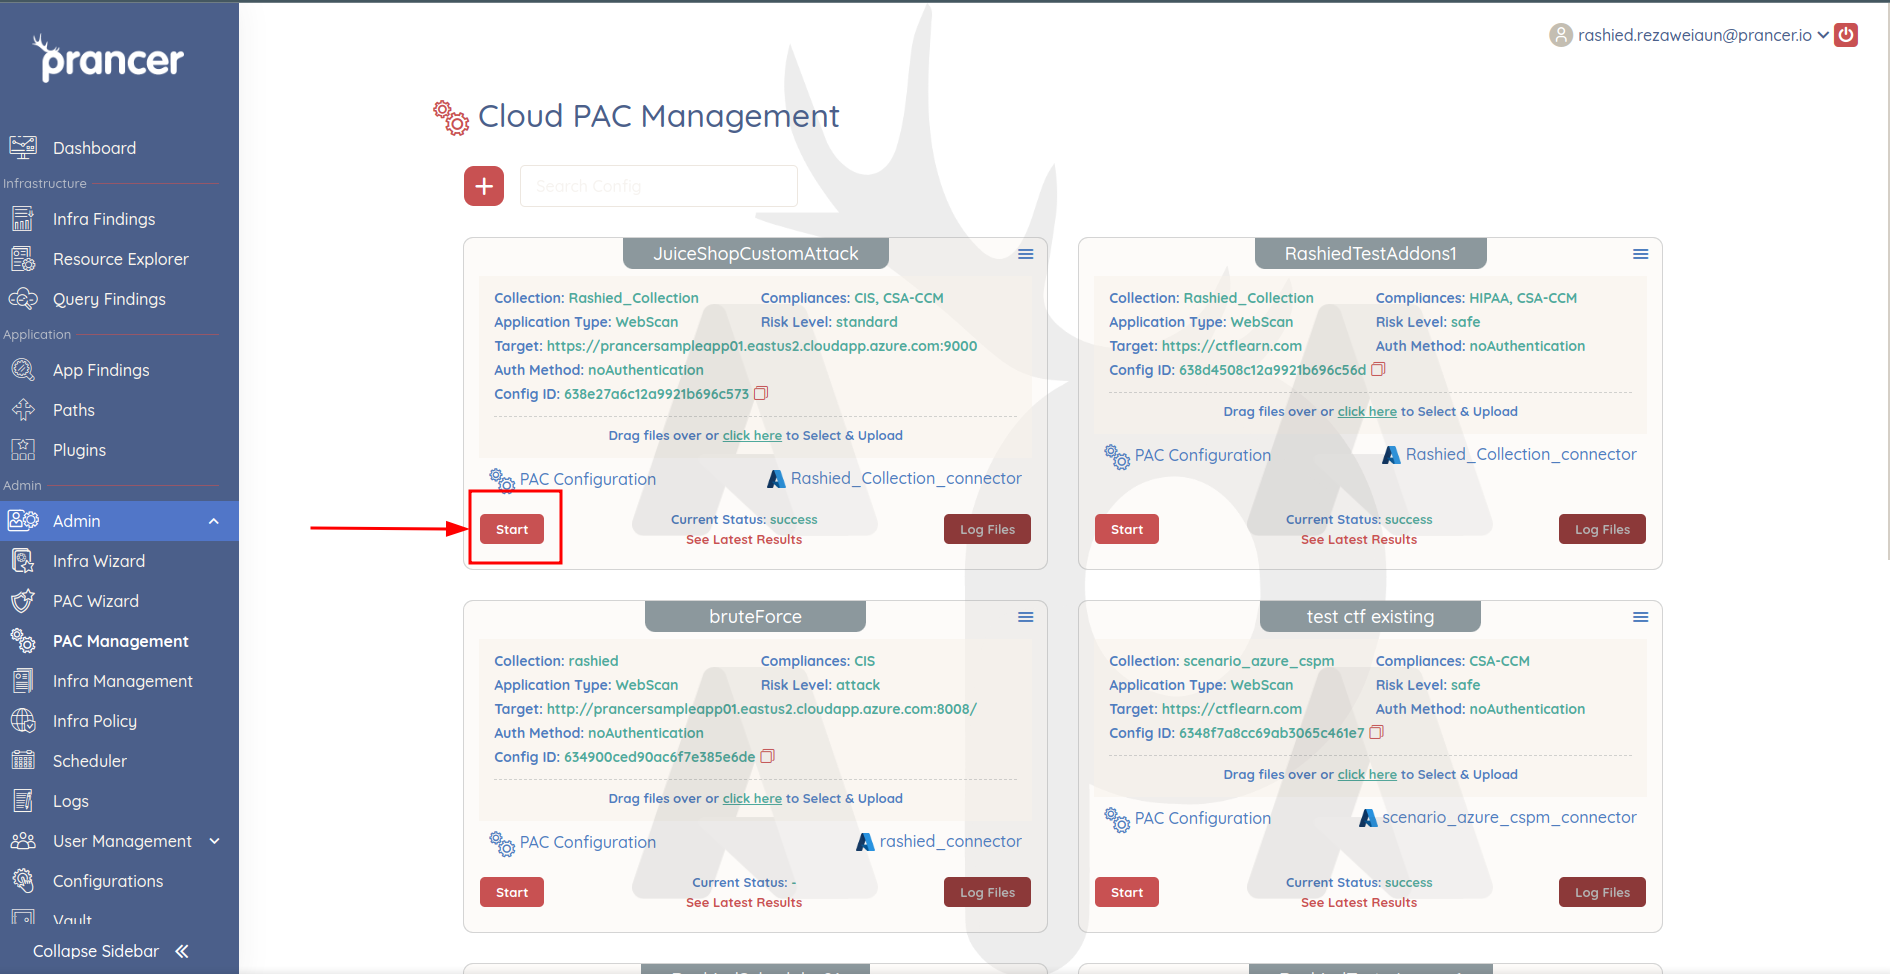
Click Start on the PAC file.
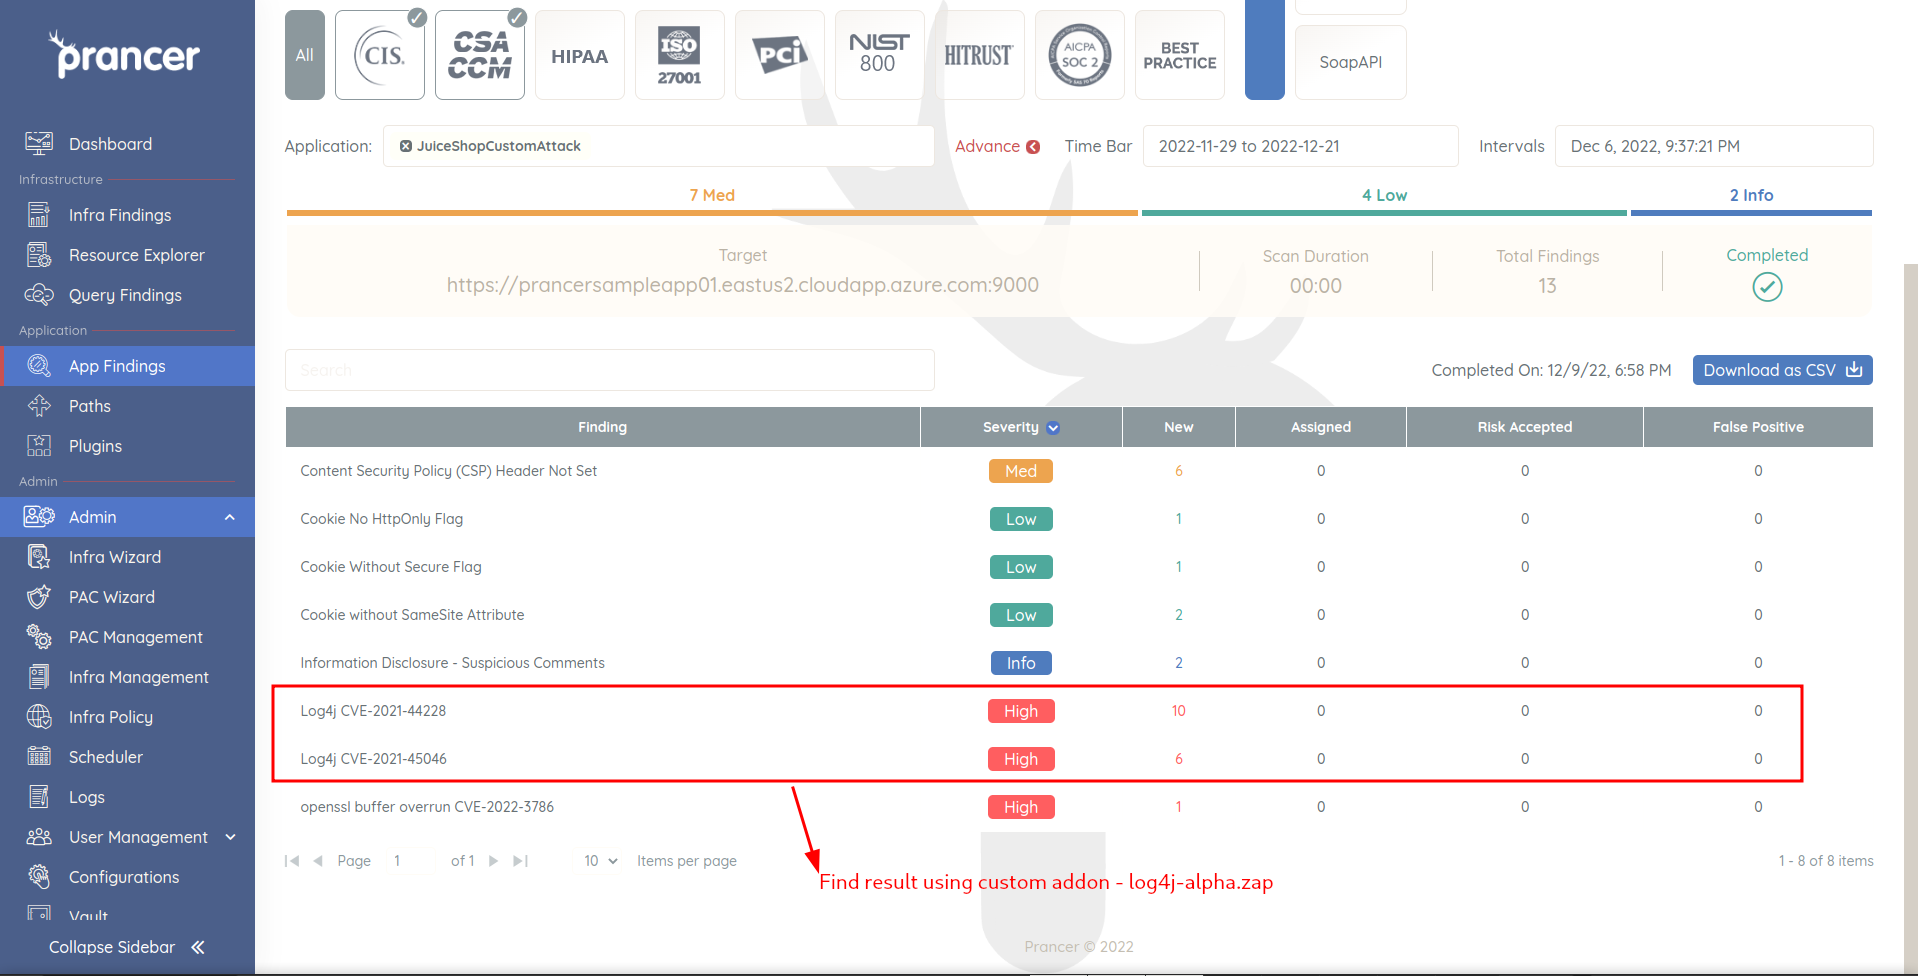
When it finishes, click See Latest Results.
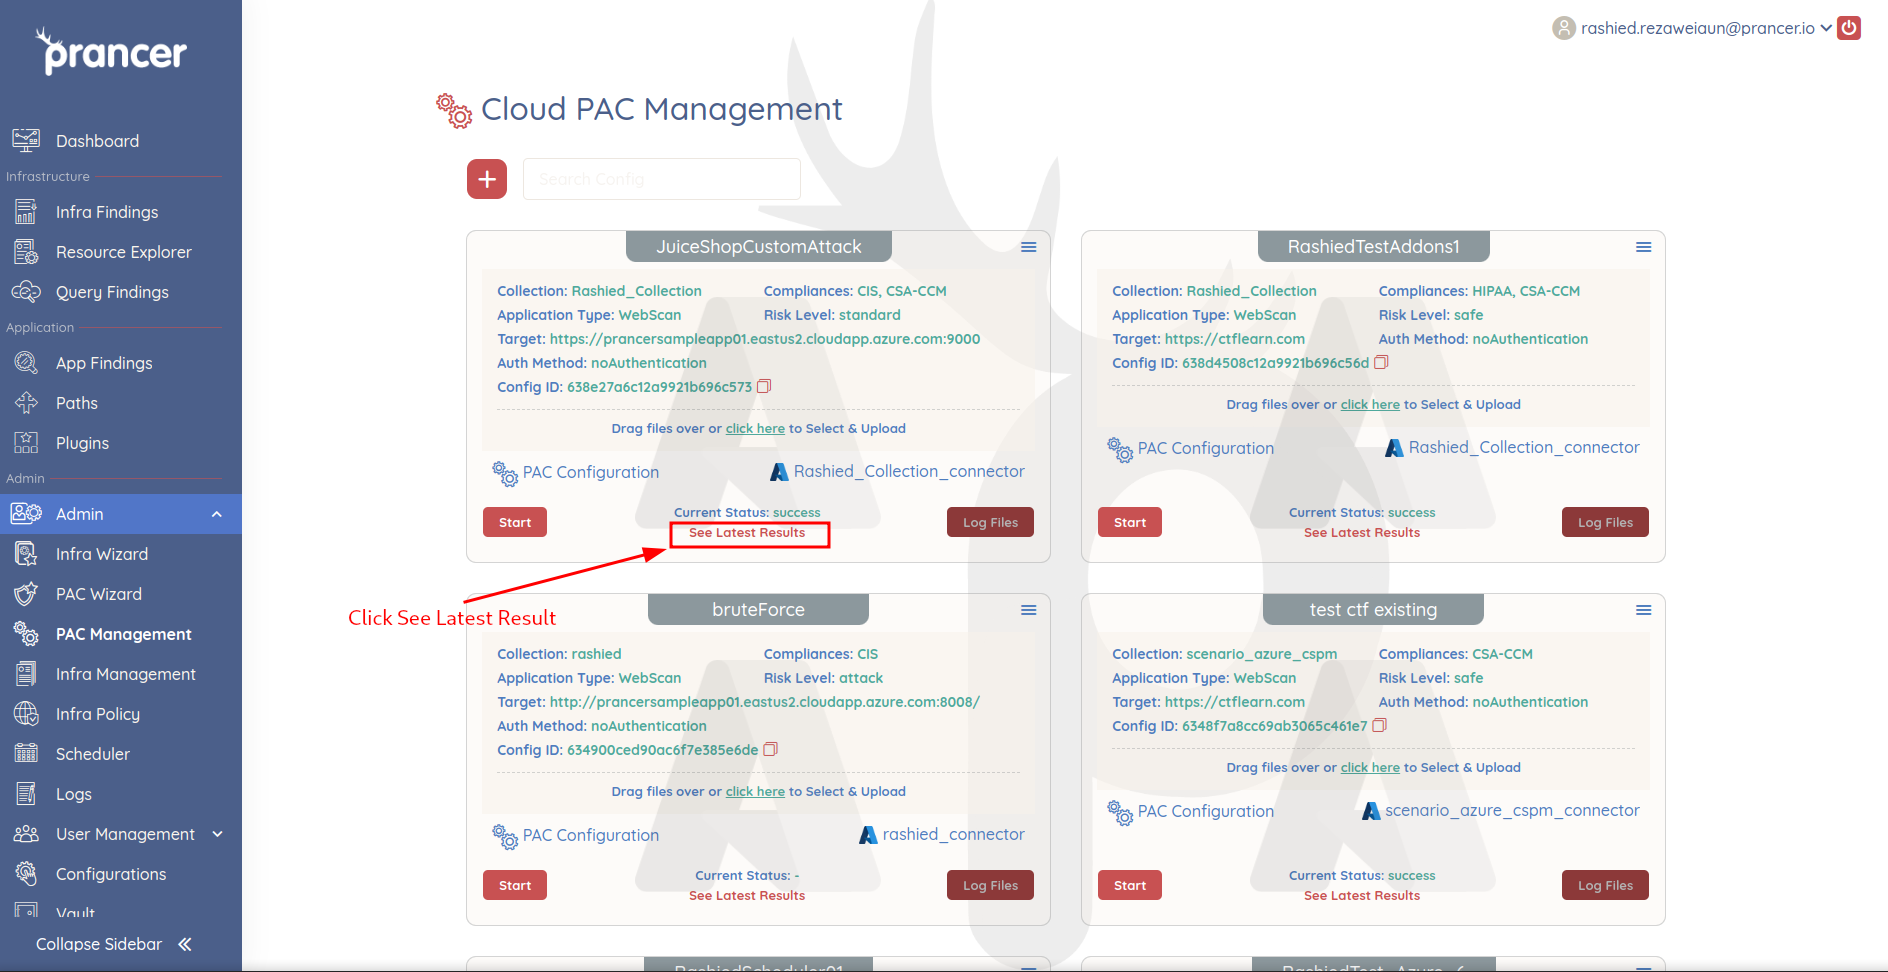
You'll land on the Application Security Findings page.
Next steps
- Skip explicit paths and load by tags: Attack Auto Tag.
- Run Nuclei templates instead: Custom Nuclei.
- Reference: metadata.yaml.