Documentation / Pentesting as Code (PAC)
PAC for AWS Cloud
PAC for AWS Cloud
Run a fully autonomous pentest against an application hosted in your AWS account. The wizard collects your inputs, generates a YAML PAC manifest, then provisions an ECS Fargate scanner that executes the test and ships the findings back to the Pentest Findings page.
Tip: if you just want a guided first-time experience, use the Autonomous Security Wizard. Use this wizard when you need fine-grained control over the scanner and target.
Before you start
You'll need:
- An AWS IAM user with an Access Key and Secret. The user needs:
- Read access to VPCs, subnets, and Secrets Manager.
- Permission to launch ECS Fargate tasks for scanners.
- *(Optional)* read access to discoverable resources for auto-discovery.
- *(For authenticated scans)* the auth secrets stored in AWS Secrets Manager.
- A clear idea of your target URL and what kind of risk level you want (
safe,attack,standard).
Open Pentest Wizard from the side menu to begin.
Step 1 — Connect to AWS
Pick AWS Cloud as the target environment, then either reuse an existing connection or click New connection.
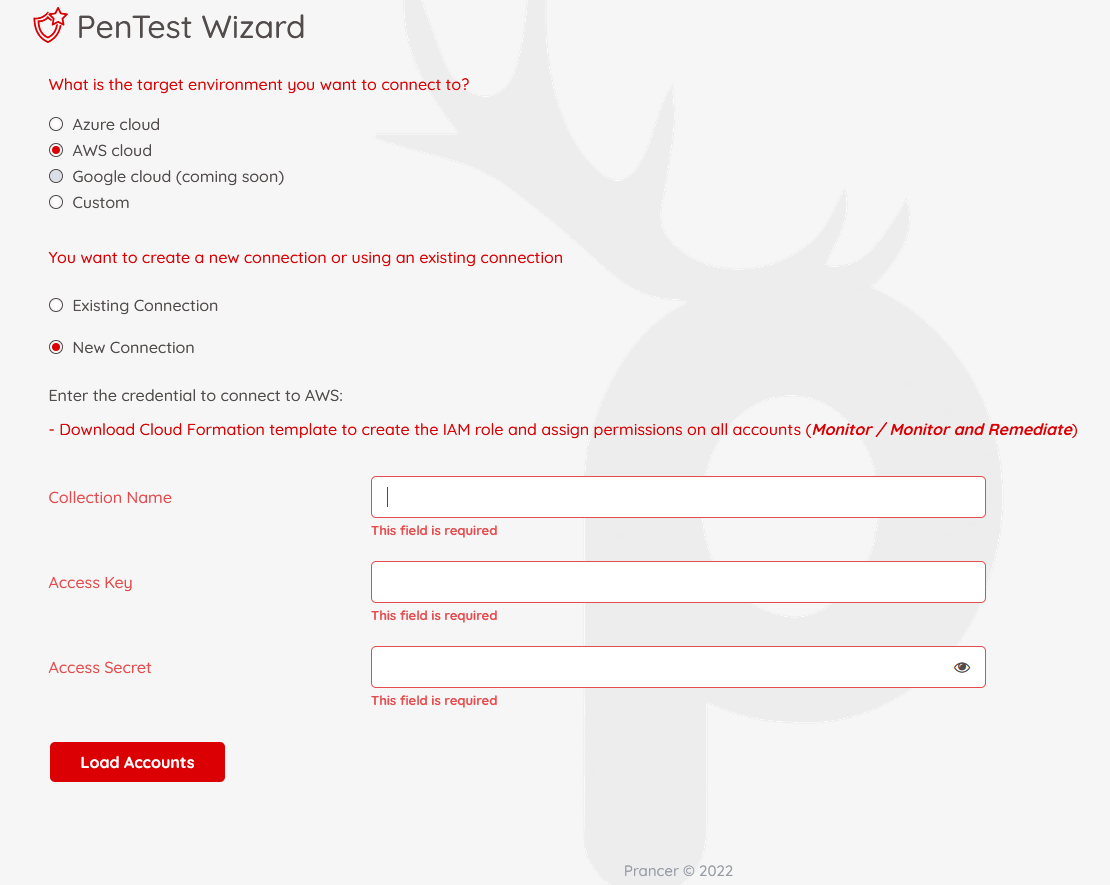
Note: Prancer authenticates with AWS via IAM users. More about IAM users on AWS.
| Field | What to enter |
| ------- | --------------- |
| Collection Name | Label that groups related pentest jobs. |
| Access Key | IAM user's access key ID. |
| Access Secret | IAM user's secret access key. |
Click Load Accounts, tick the accounts to include, then Next.
Step 2 — Application information
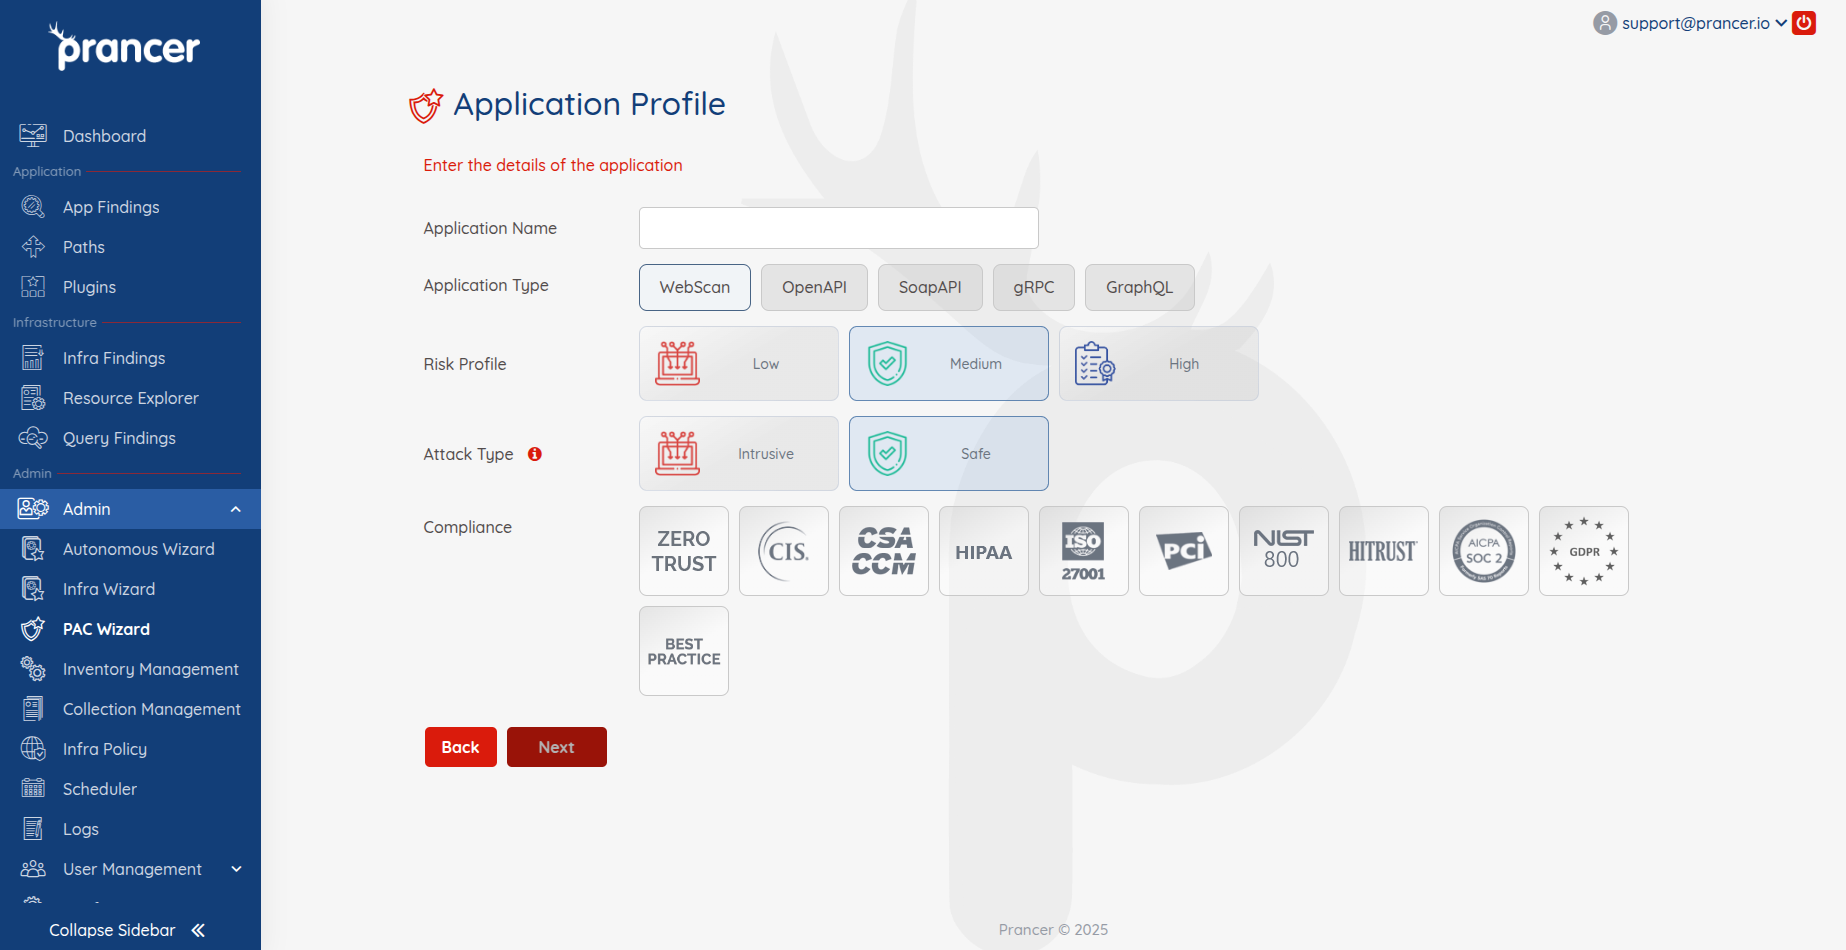
| Field | Notes |
| ------- | ------- |
| Application Name | Identifier for this app. |
| Application Type | Web, Open API, or SOAP. |
| Risk Level | Safe (production-safe), Attack (active payloads), Standard (both). |
| Compliance | PCI, HIPAA, etc. — used to filter and label findings. |
| Schedule | Once or recurring. |
| Scanner Instance | Stop or delete the scanner after the run. |
Note: scanners run on AWS ECS Fargate. Learn more about ECS.
Step 3 — Scanner setup
Pick one of three options.
Option A — Existing scanner
Pick the AWS account, region, and ECS instance.
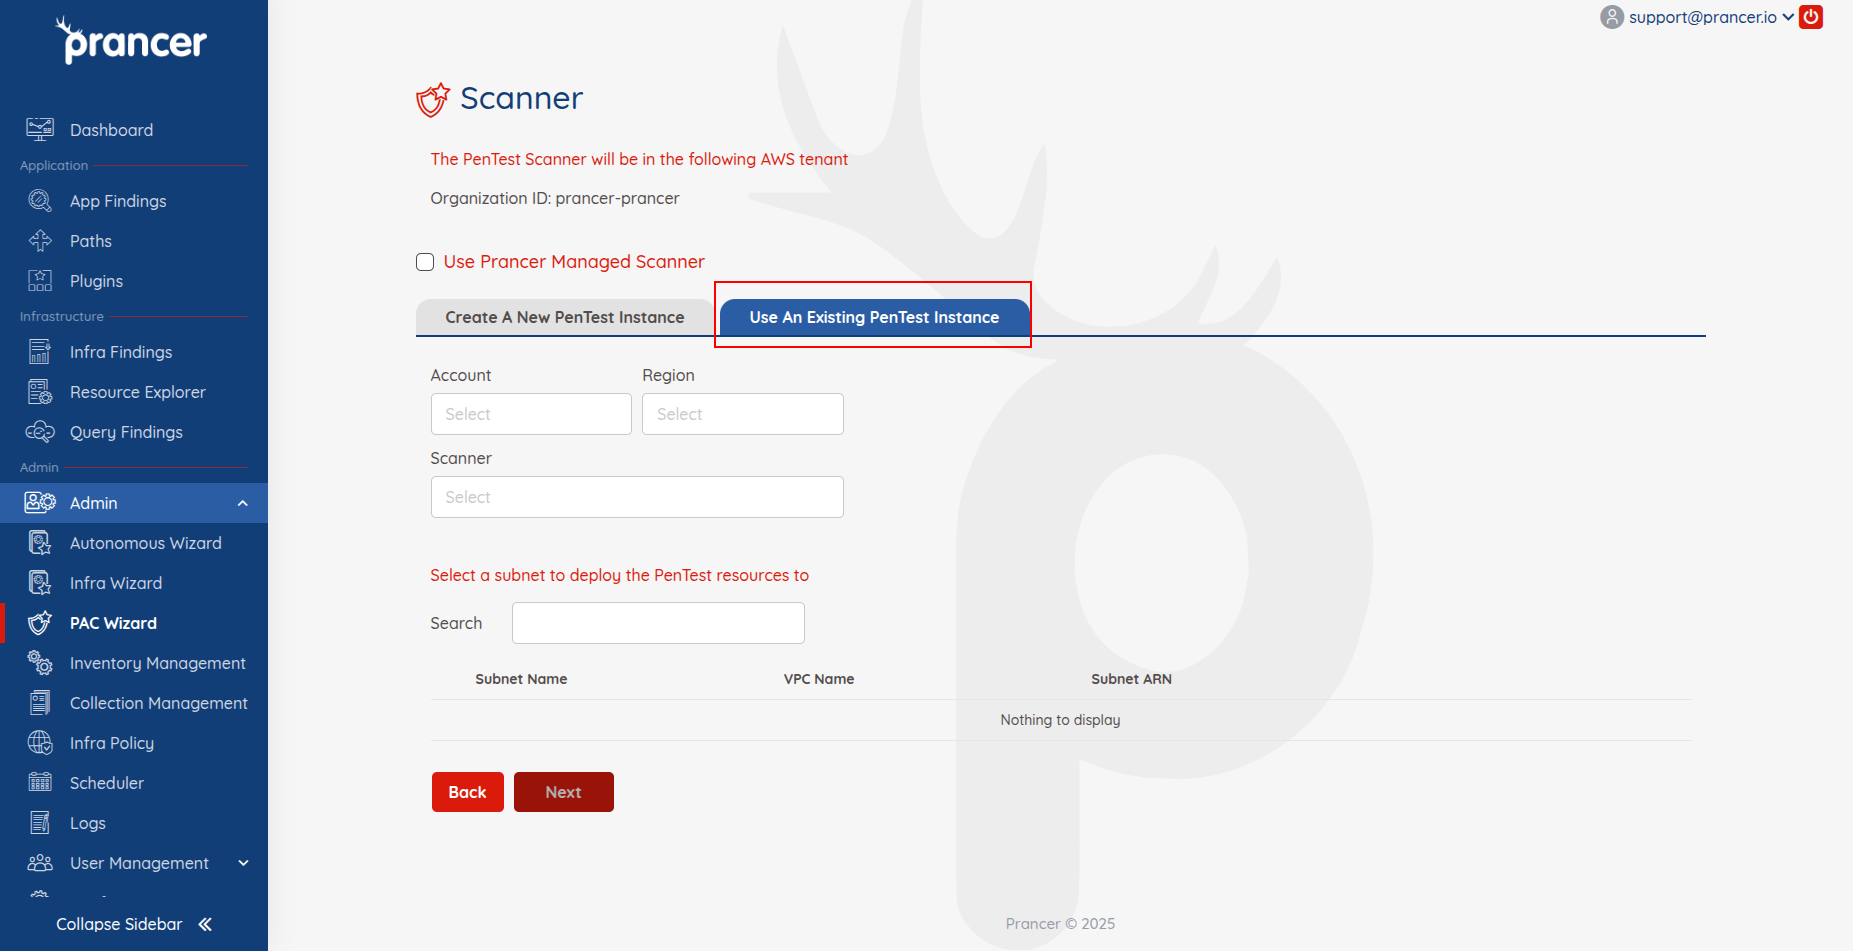
Warning: the IAM user must have read access to ECS resources, or the dropdown will be empty.
Option B — New scanner
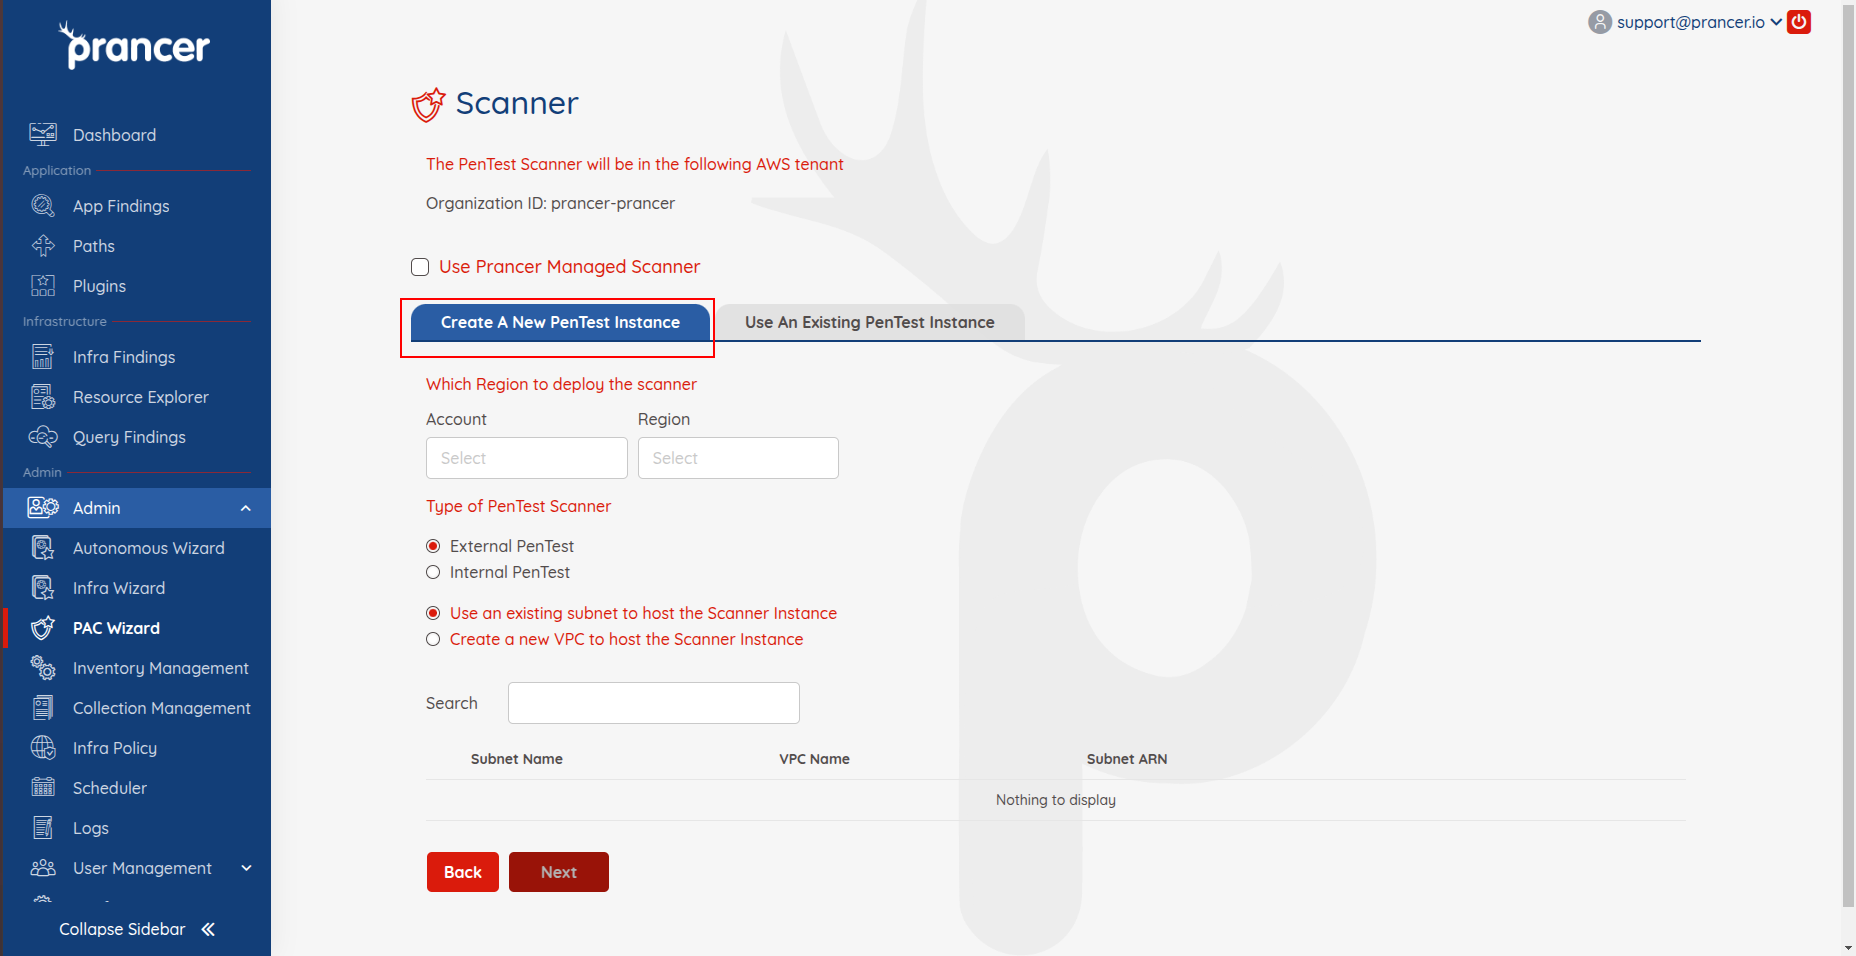
- External Pentest — public IP, for internet-facing apps.
- Internal Pentest — launches inside a private subnet for internal targets.
You'll also need to pick the target VPC and Subnet.
Option C — Prancer-managed scanner
!Prancer-managed scanner option
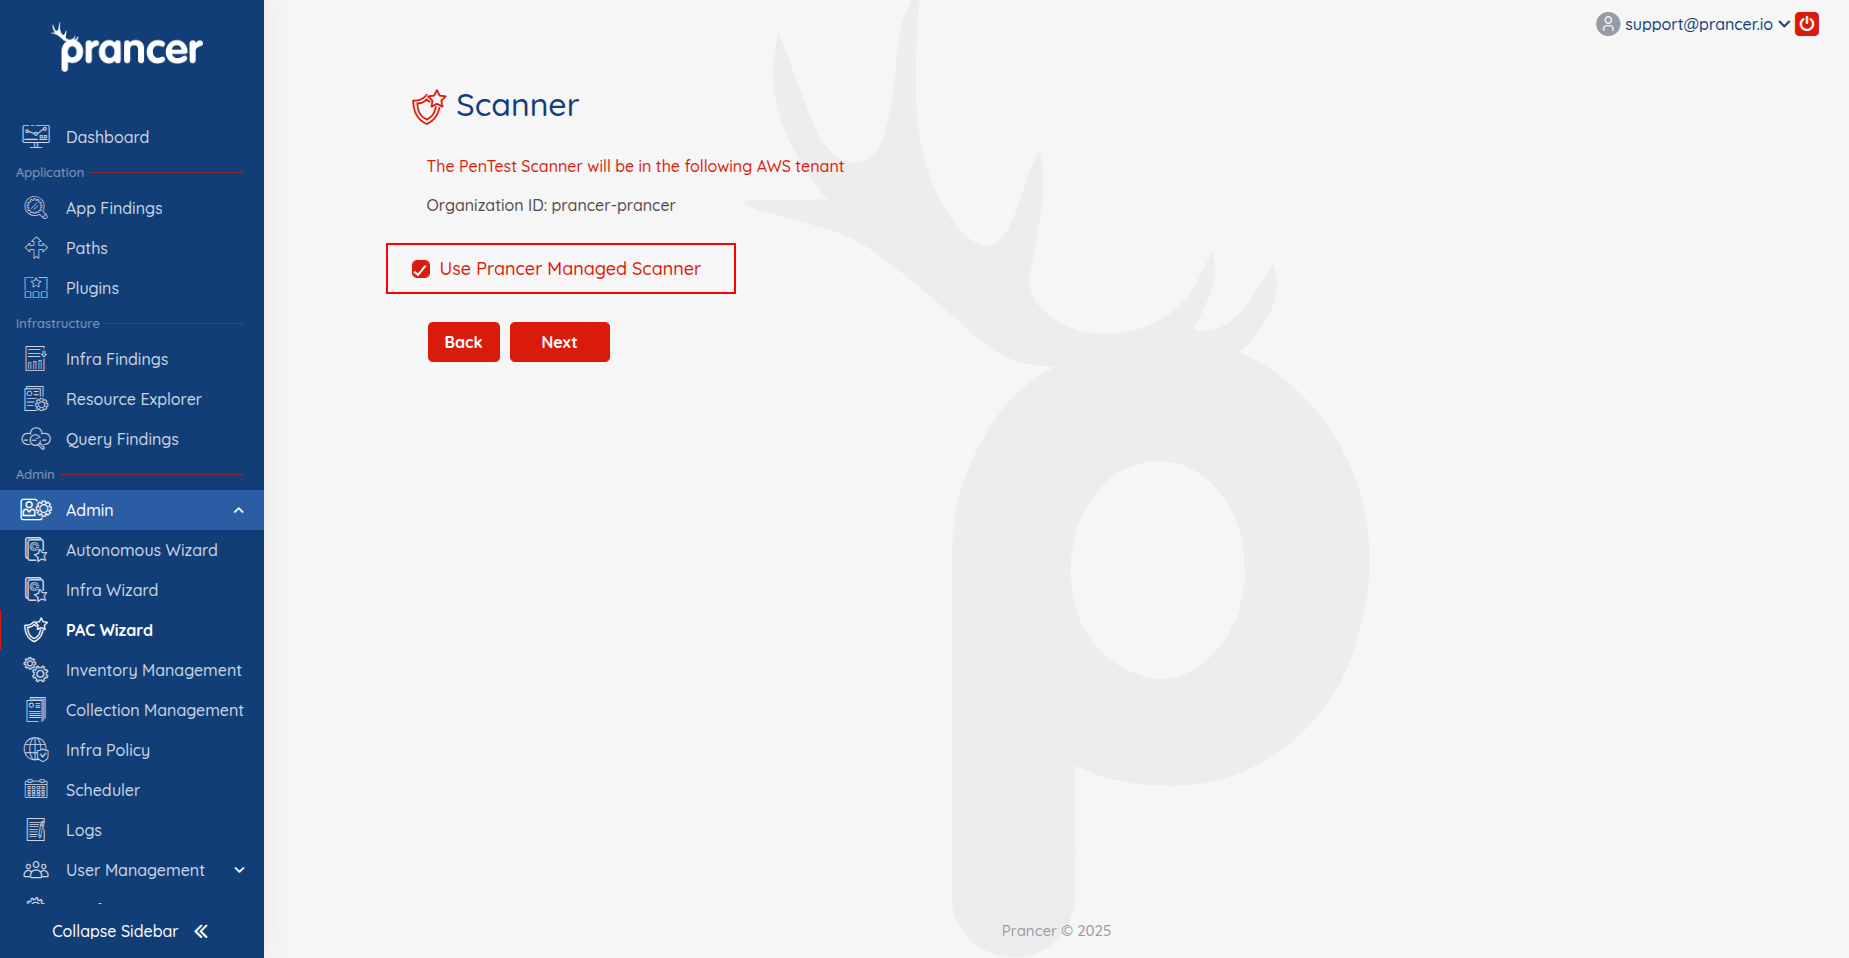
Hand off scanner provisioning entirely to Prancer.
Step 4 — Target selection
Manual URL
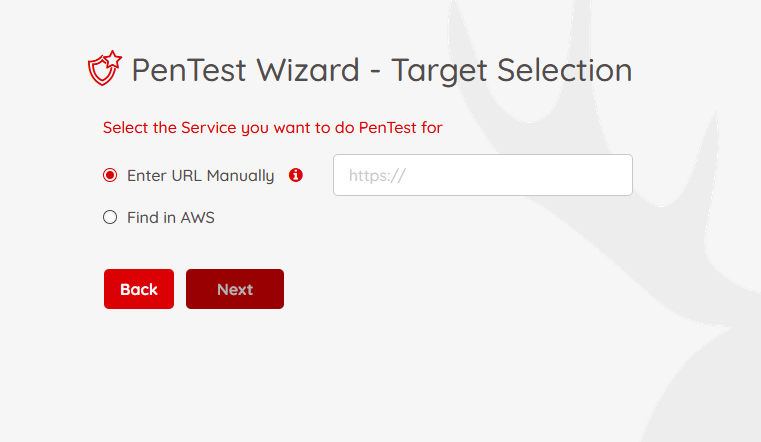
Enter URLs by hand — AWS-hosted (EC2, API Gateway) or external.
Auto-discovery via CSPM
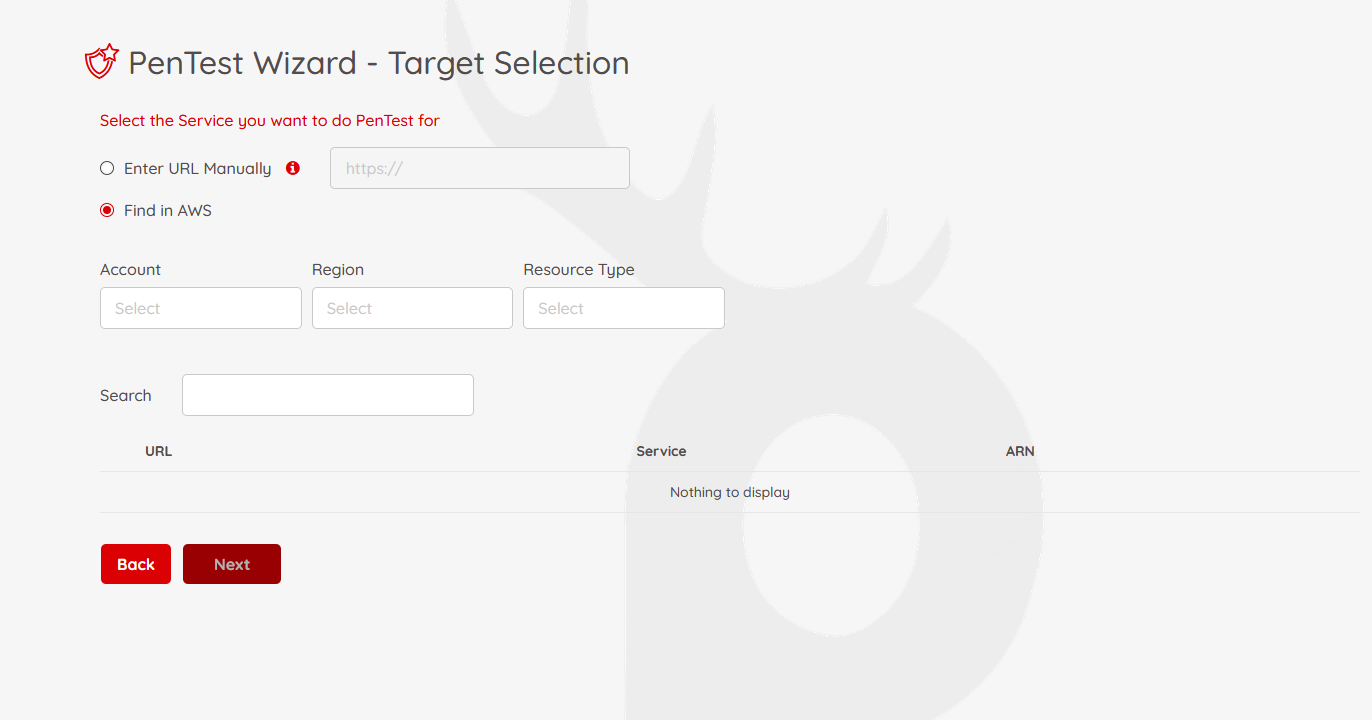
Let Prancer's CSPM engine discover eligible endpoints in your AWS estate.
Note: auto-discovery requires the IAM user to have read access to the resources you want to find.
Step 5 — Authentication
Supported methods: Form-based, HTTP / NTLM, JSON-based, Azure AD, JWT Token.
Warning: PAC never stores secrets. Credentials are pulled from AWS Secrets Manager at runtime.
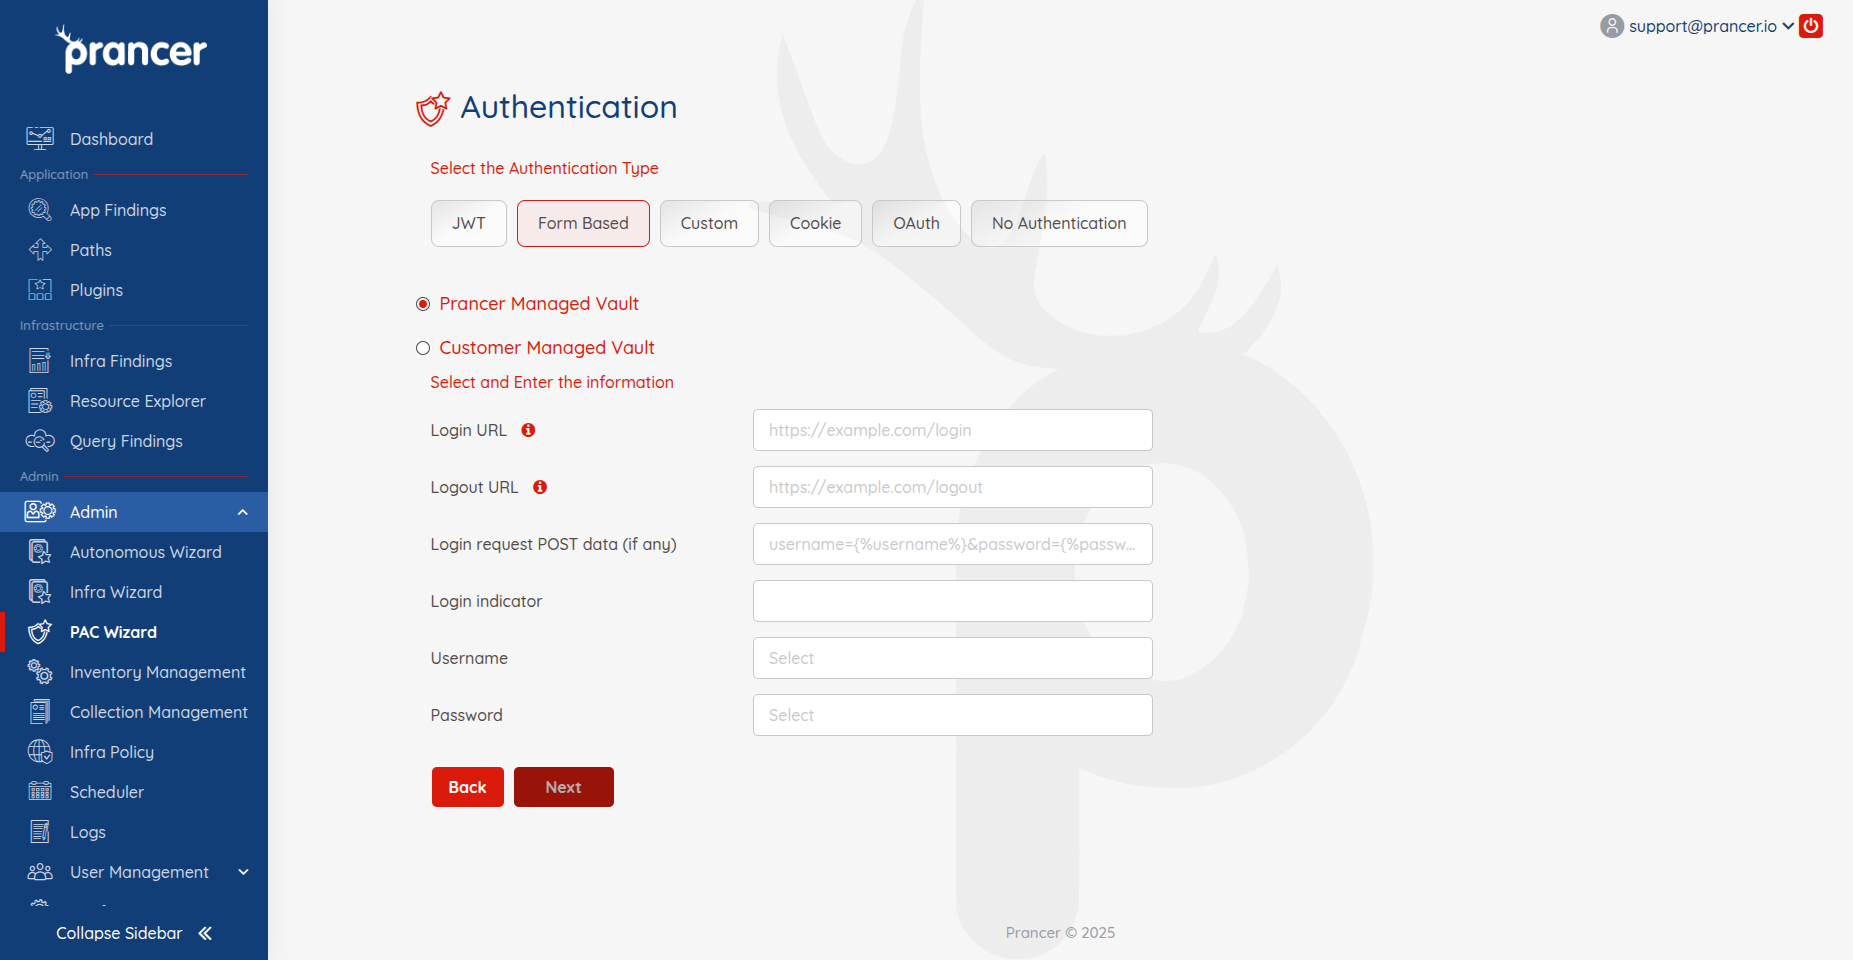
Pick the AWS account, region, and Secrets Manager that hold the auth secrets.
Example — Form-based auth
| Field | Example |
| ------- | --------- |
| Login URL | /login |
| Logout URL | /logout |
| Post Data Format | identity={%username%}&password={%password%} |
| Login Indicator | A string only present when logged in (e.g. logout). |
| Username / Password | Pick the secret keys from the dropdown. |
Step 6 — Review the PAC file
PAC generates a YAML manifest. Tweak any values you need (scanner name, target URLs, schedule).
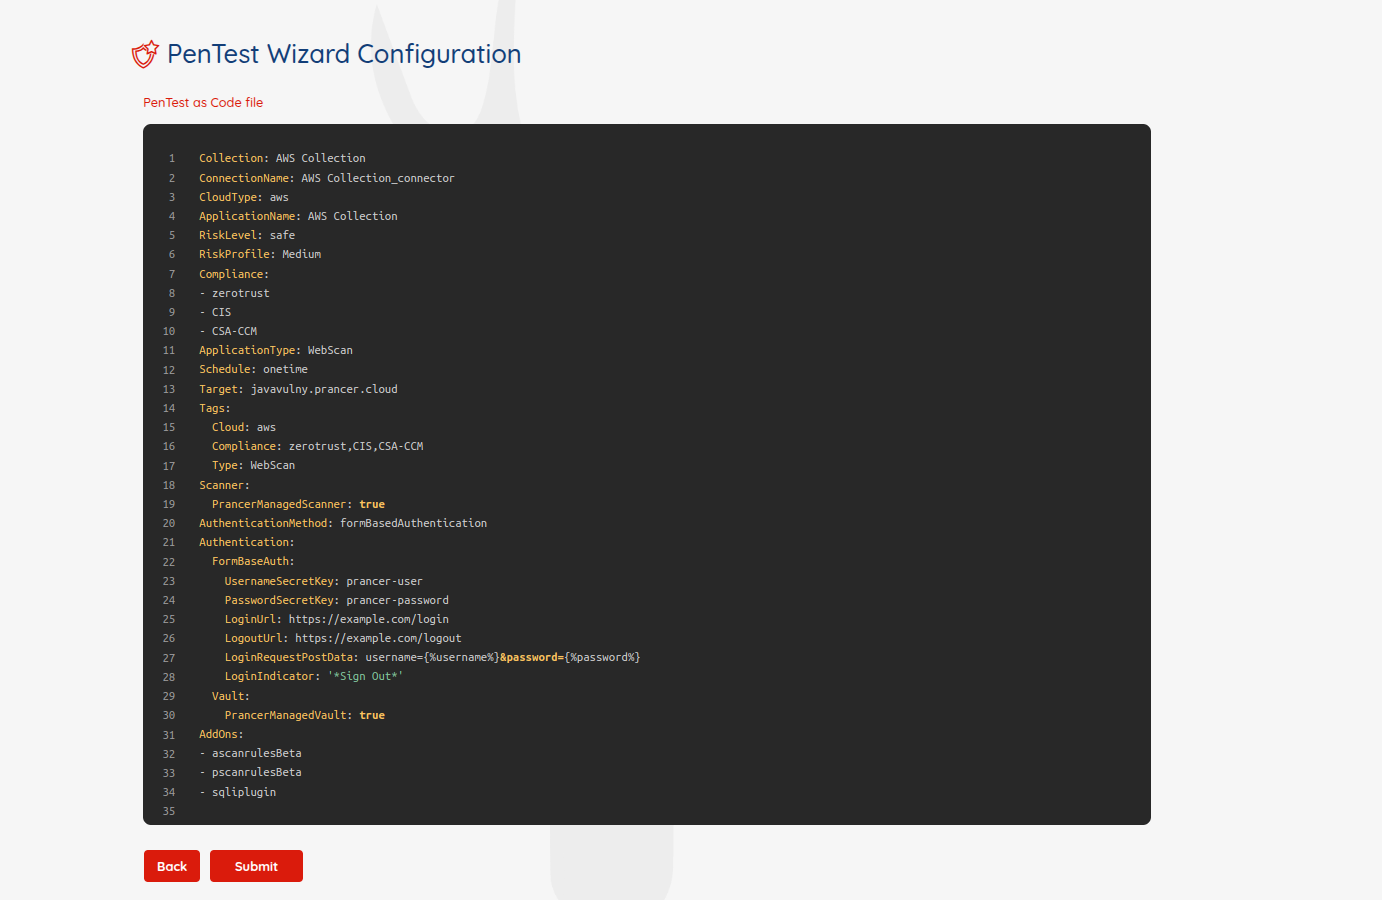
Click Submit to launch the run.
What happens next
1. PAC connects to your AWS account. 2. Provisions or reuses an ECS scanner. 3. Executes the pentest. 4. Pushes results to the Pentest Findings page within minutes.
Next steps
Image gap: we should add a one-pager IAM policy template (JSON) so users can paste-and-go instead of stitching permissions together manually.