Documentation / Pentesting as Code (PAC)
PAC for Azure Cloud
PAC for Azure Cloud
Run an autonomous pentest against an Azure-hosted application. The wizard generates a YAML PAC manifest, provisions an Azure Container Instance (ACI) scanner, executes the test, and pushes findings to the Pentest Findings page.
Before you start
You'll need:
- An Azure Service Principal Name (SPN) with:
- Read on the subscription (for resource groups, Key Vaults, vnets/subnets).
- Read on Key Vault secrets (for authenticated scans).
- Permission to create resources — PAC creates an ACI for each pentest.
- *(Optional)* Read on Azure AD if you want to auto-discover App Registrations / Enterprise Apps.
- *(Optional)* Read on Azure Resources for auto-discovery of pentest targets.
- *(For authenticated scans)* the auth secrets stored in Azure Key Vault.
- The target URL and which risk level (
safe,attack,standard) you want.
Open Pentest Wizard from the side menu to begin.
Step 1 — Connect to your Azure tenant
Pick Azure Cloud, then reuse an existing connection or click New connection.
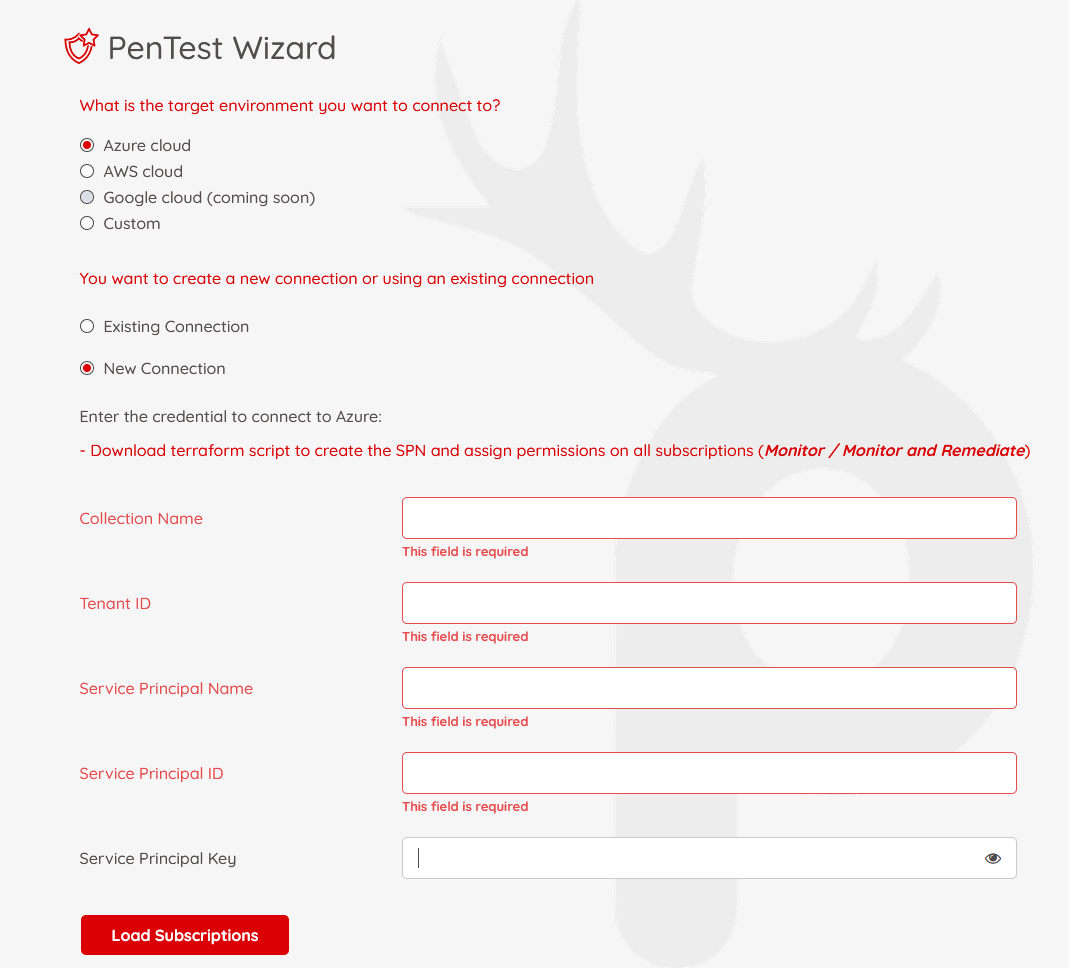
| Field | What to enter |
| ------- | --------------- |
| Collection Name | Label for this pentest project. |
| Tenant ID | Azure tenant ID. |
| Service Principal Name | SPN display name. |
| Service Principal ID | Application (client) ID of the SPN. |
| Service Principal Key | Client secret. |
Tip: see Microsoft's docs on creating an SPN. Grant the permissions listed above before continuing.
Click Load Subscriptions, pick the ones you want in this collection, then Next.
Step 2 — Application information
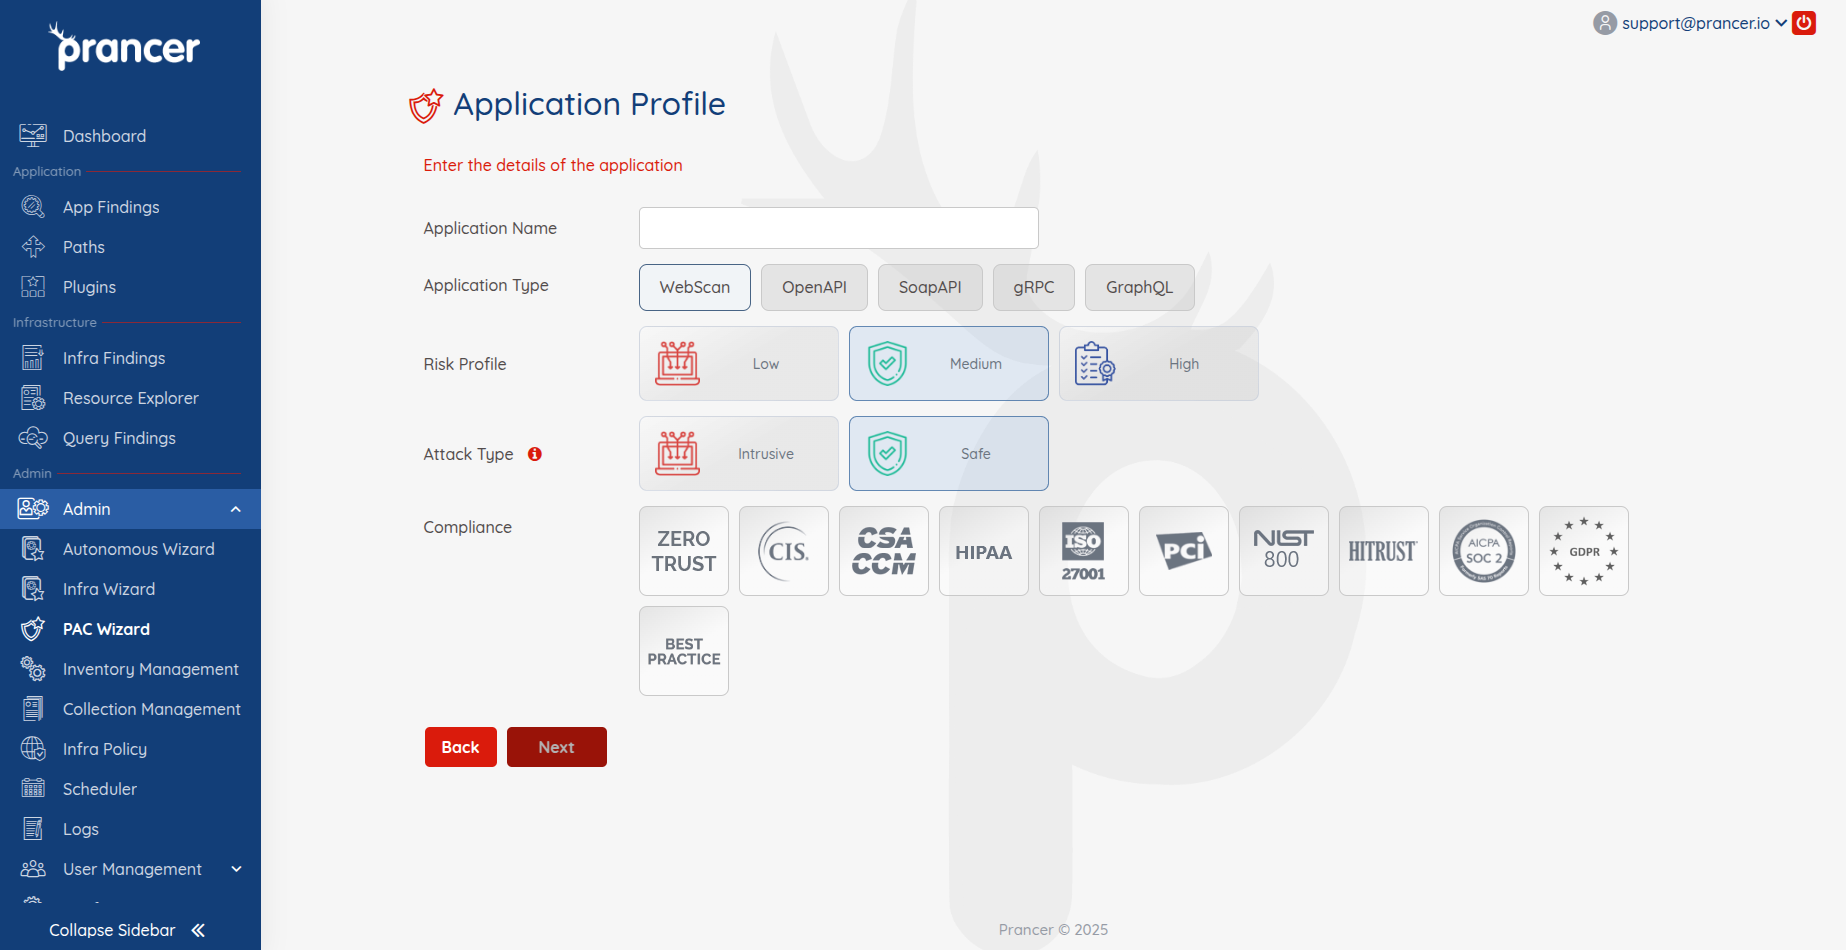
| Field | Notes |
| ------- | ------- |
| Application Name | Identifier for this app. |
| Application Type | Web, Open API, or SOAP. |
| Risk Level | Safe for production, Attack for non-prod, Standard for both. |
| Compliance | Used to filter and label findings later. |
| Schedule | One-time or recurring. |
| Scanner Instance | Stop or delete after the run. |
Note: scanners run on Azure Container Instances (ACI).
Step 3 — Scanner setup
Option A — Existing scanner
Pick subscription, region, resource group, and ACI instance.
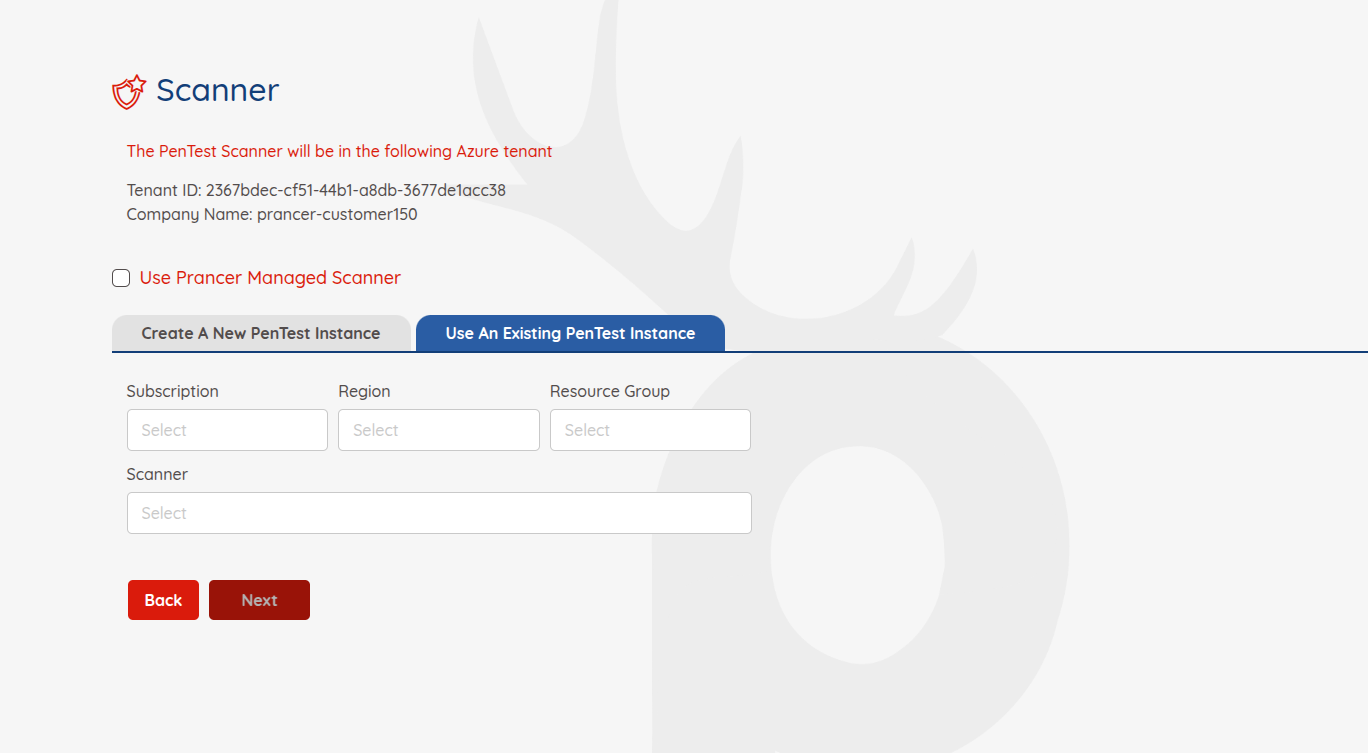
Warning: the SPN must have read access on the ACI resources.
Option B — New scanner
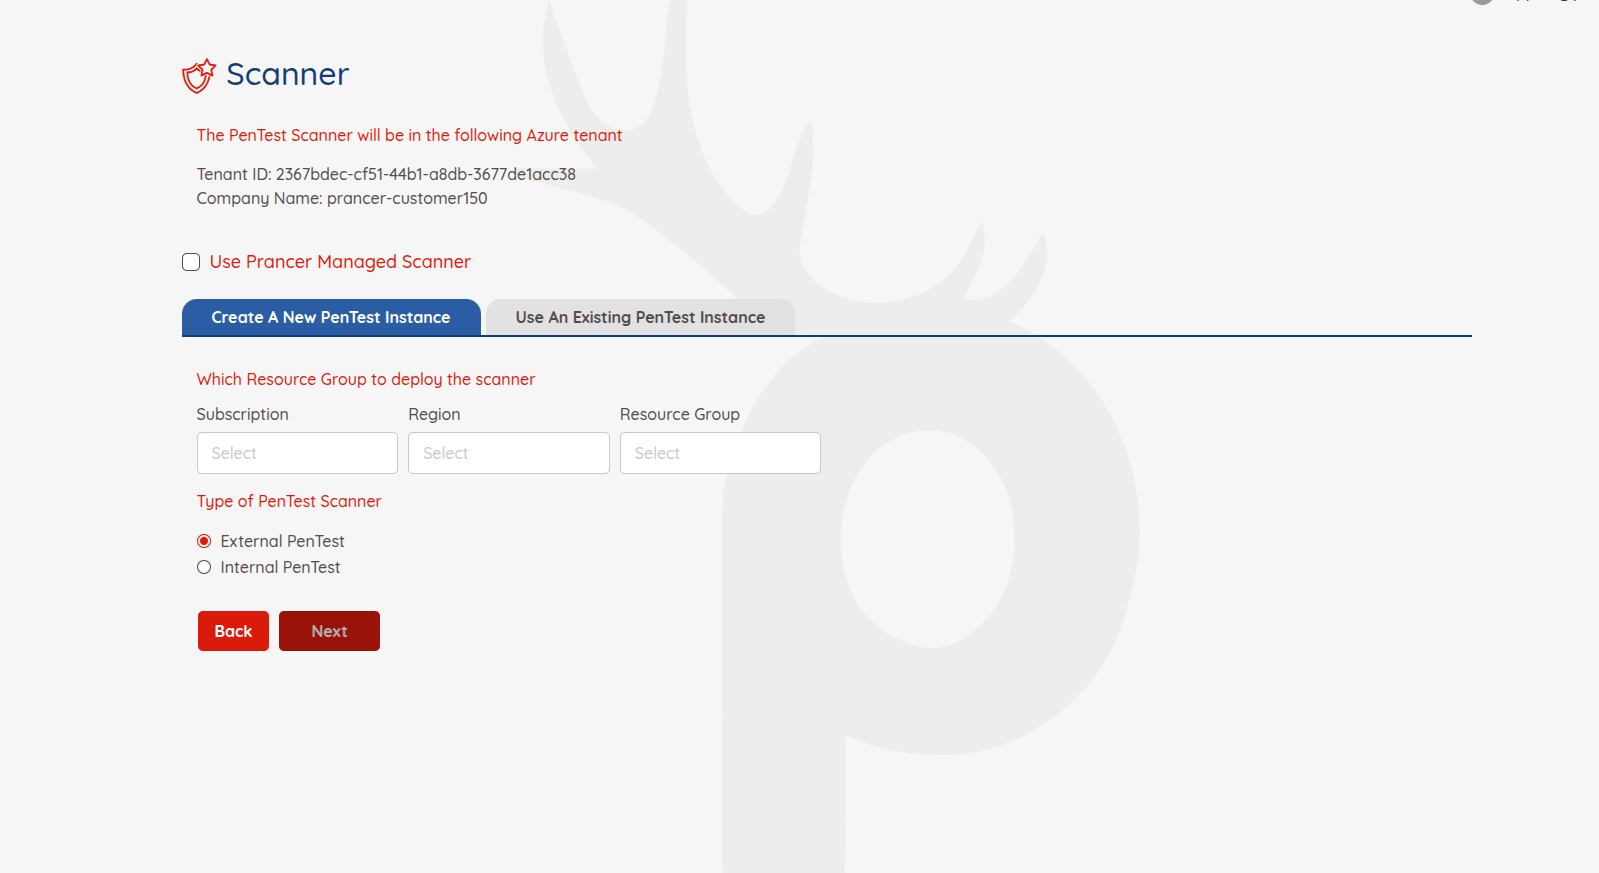
- External Pentest — ACI gets a public IP; use for internet-facing apps.
- Internal Pentest — ACI joins your subnet; use for resources only reachable inside the vnet.
Option C — Prancer-managed scanner
!Prancer-managed scanner option
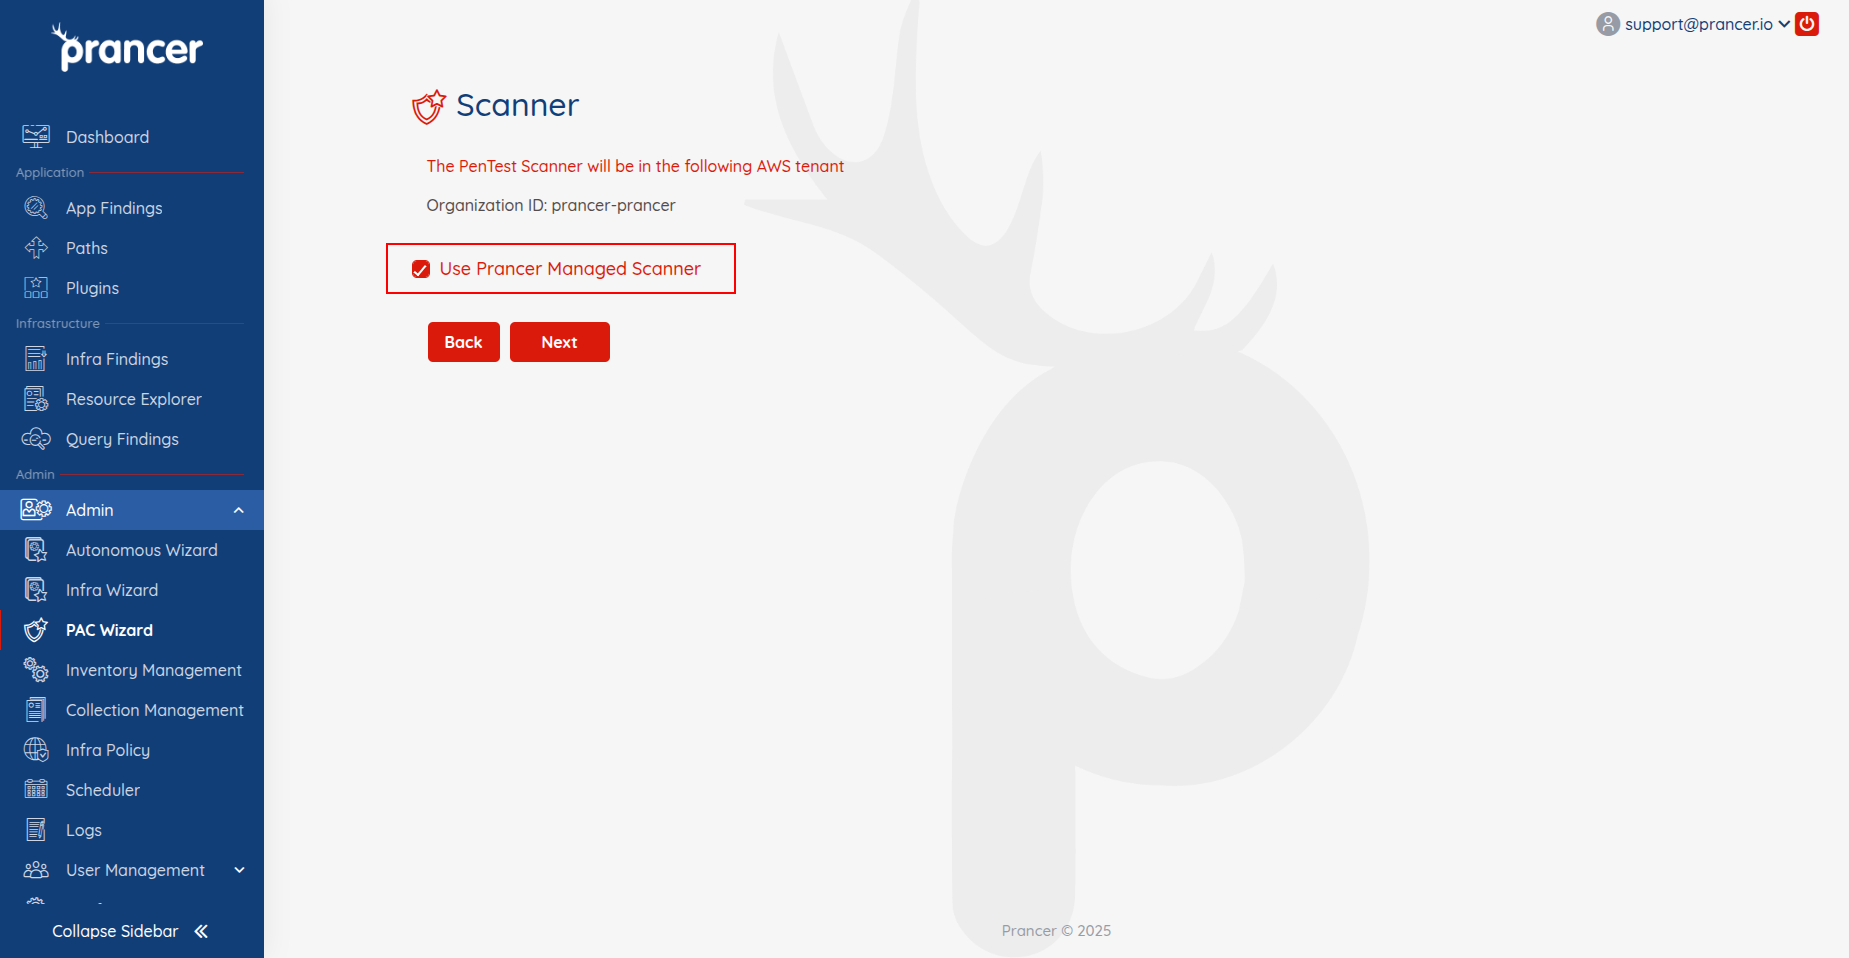
Hand off ACI provisioning entirely to Prancer.
Step 4 — Target selection
Manual URL
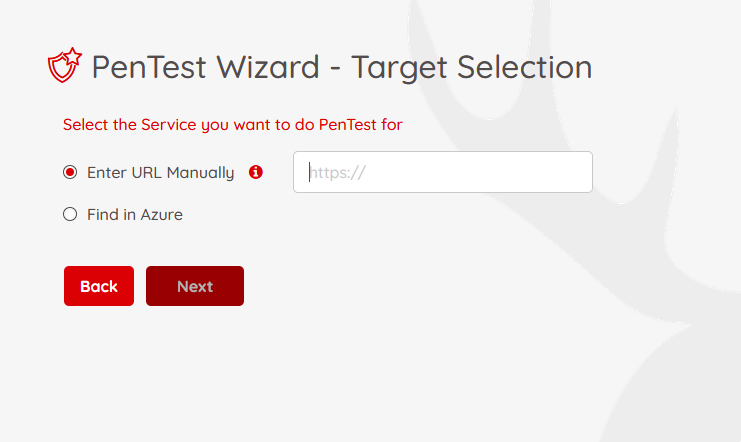
Enter URLs by hand — Azure-hosted (VM, App Service, API Gateway) or external.
Auto-discovery
!Auto-discovered Azure targets
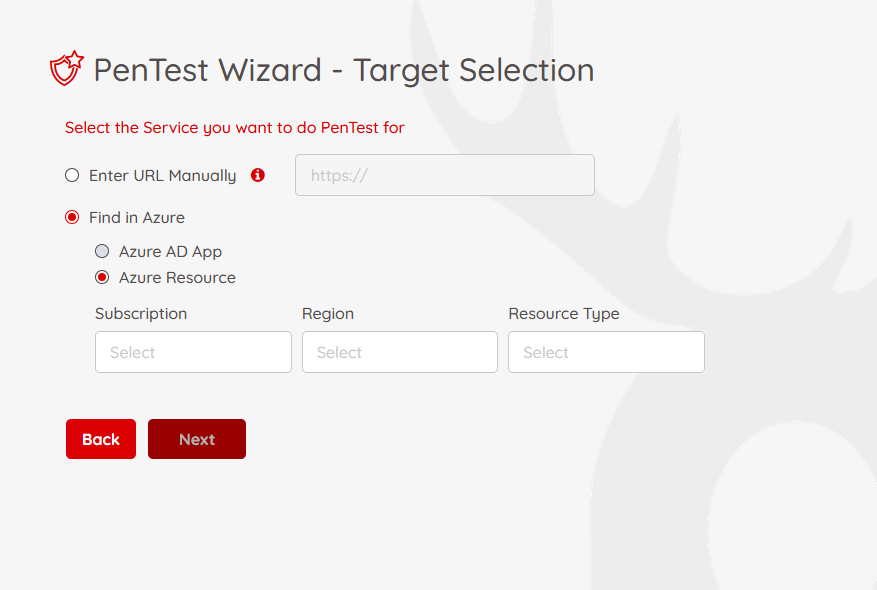
Pick Azure AD App to list endpoints from App Registrations, or Azure Resource to scope by resource type.
Note: the SPN must have read access to whatever you're discovering.
Step 5 — Authentication
Supported methods: Form-based, HTTP / NTLM, JSON-based, Azure AD, JWT Token.
Warning: PAC never stores secrets. Credentials are pulled from Azure Key Vault at runtime.
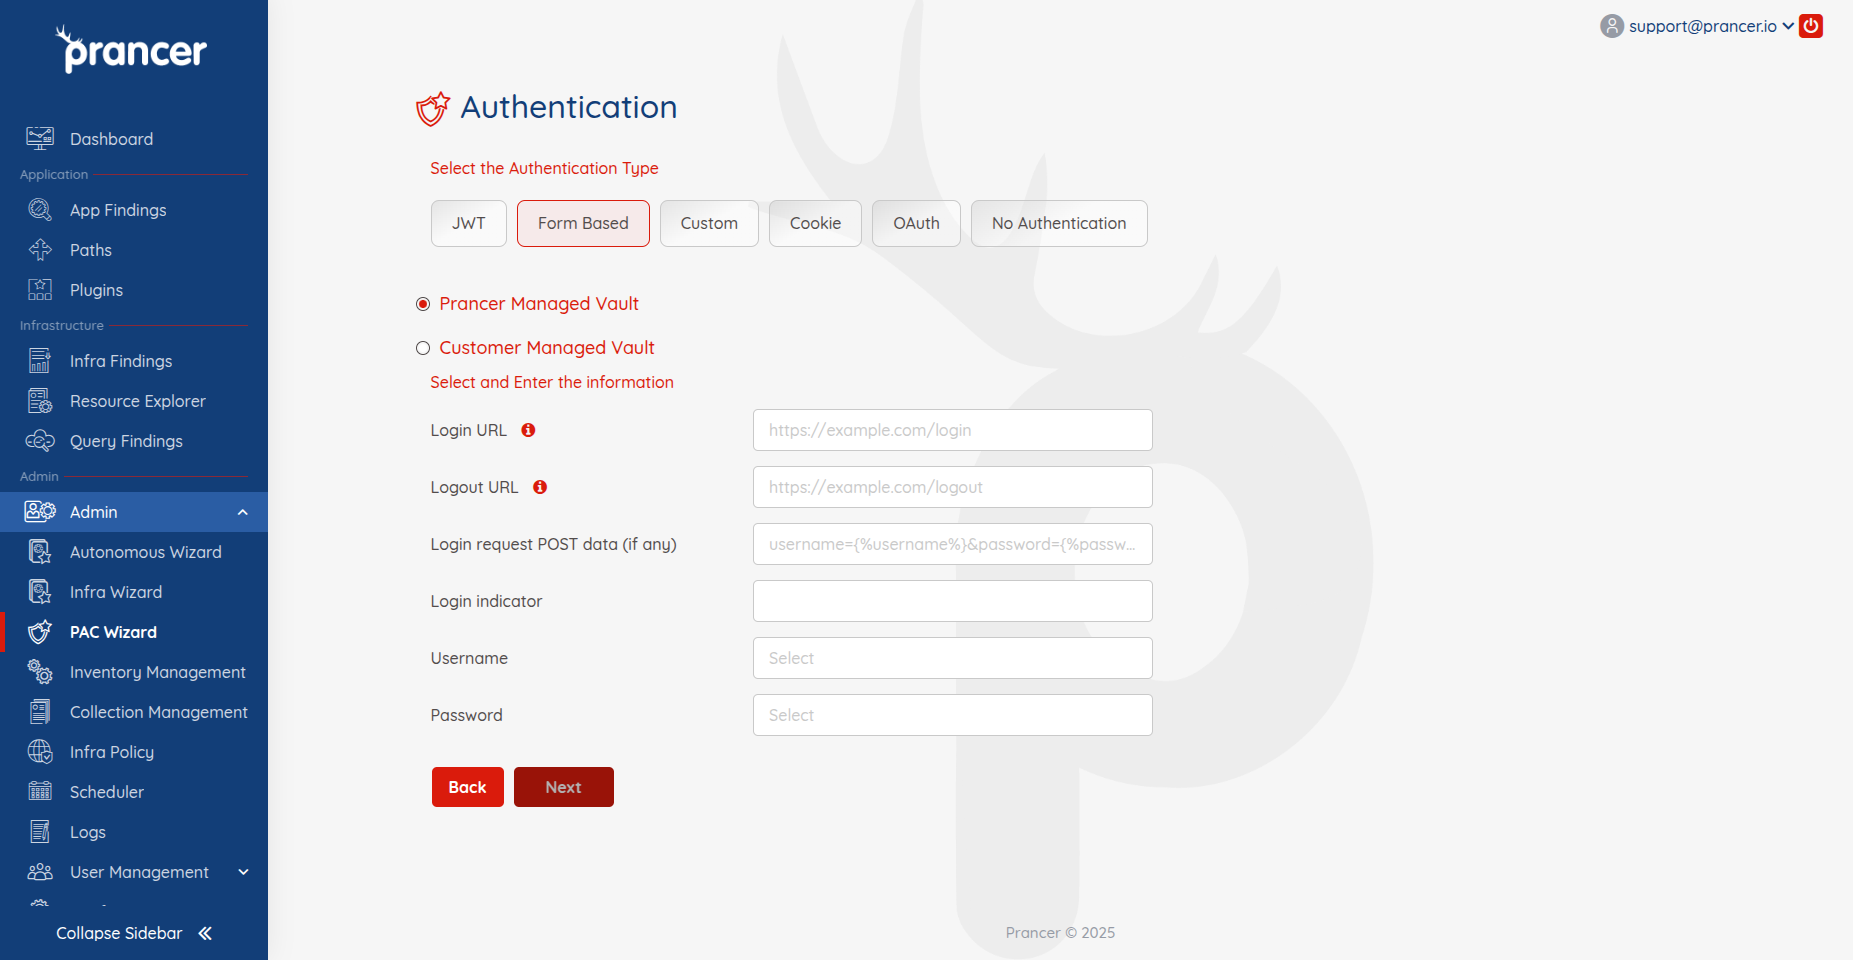
Pick the subscription, region, resource group, and Key Vault that hold the auth secrets.
Example — Form-based auth
| Field | Example |
| ------- | --------- |
| Login URL | /login |
| Logout URL | /logout |
| Login Request Post Data | identity={%username%}&password={%password%} |
| Login Indicator | A string only present when logged in (e.g. logout link). |
| Username / Password | Pick the Key Vault secret names. |
Step 6 — Review the PAC file
PAC generates a YAML manifest. Tweak fields like ResourceName (prancer-instances by default) to match your naming convention.
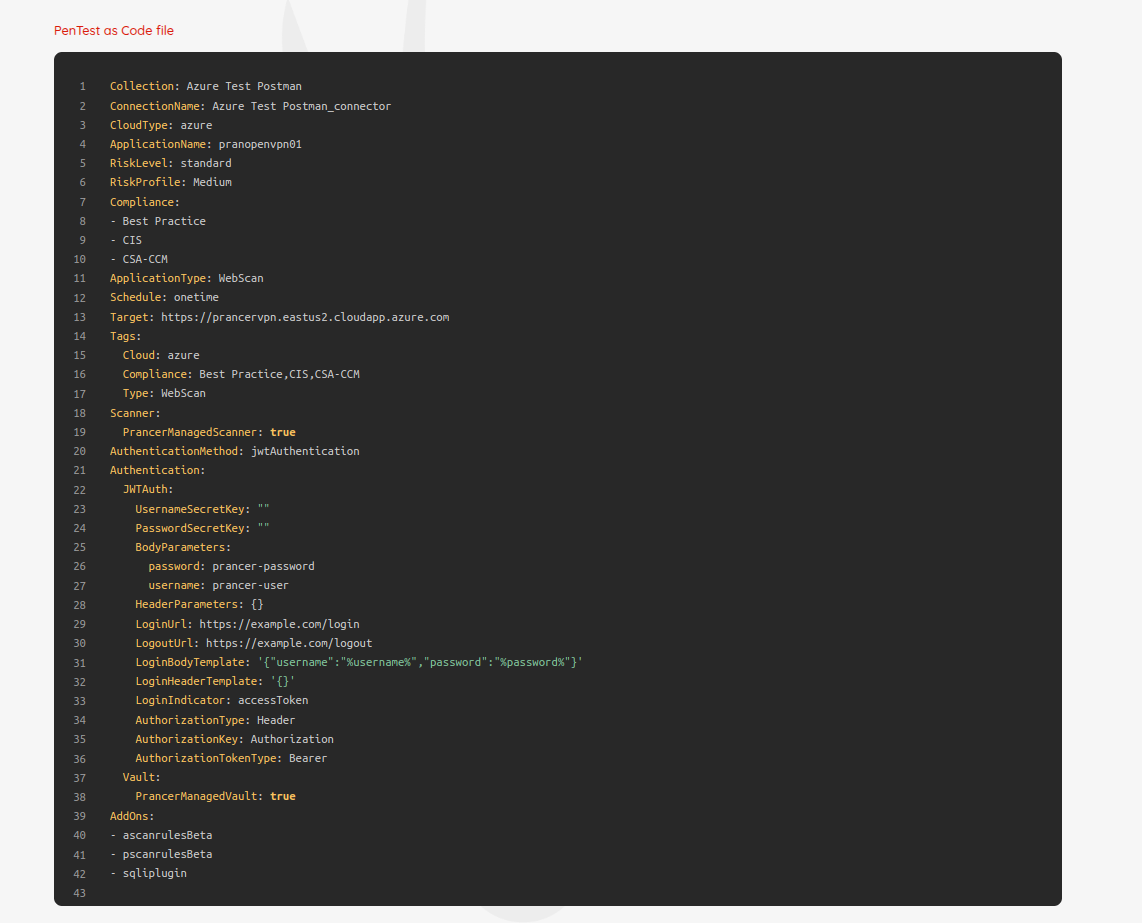
Click Submit to launch the run.
What happens next
PAC talks to your Azure tenant, provisions the ACI scanner, runs the pentest, and writes findings to the Pentest Findings page.