Documentation / Pentesting as Code (PAC)
PAC as a custom instance
PAC as a Custom Instance
Use the Custom wizard when you want to run PAC outside the supported clouds — on a developer laptop, inside a CI/CD pipeline, on a self-managed VM, or in a cloud Prancer doesn't natively support yet.
Tip: the wizard's only job here is to generate the PAC manifest. You then run that manifest with the PAC CLI wherever you like.
Before you start
- You're logged into the portal.
- You have Docker available wherever you'll run the scan.
- A target URL and the API token you'll use for the CLI.
Step 1 — Pick the target environment
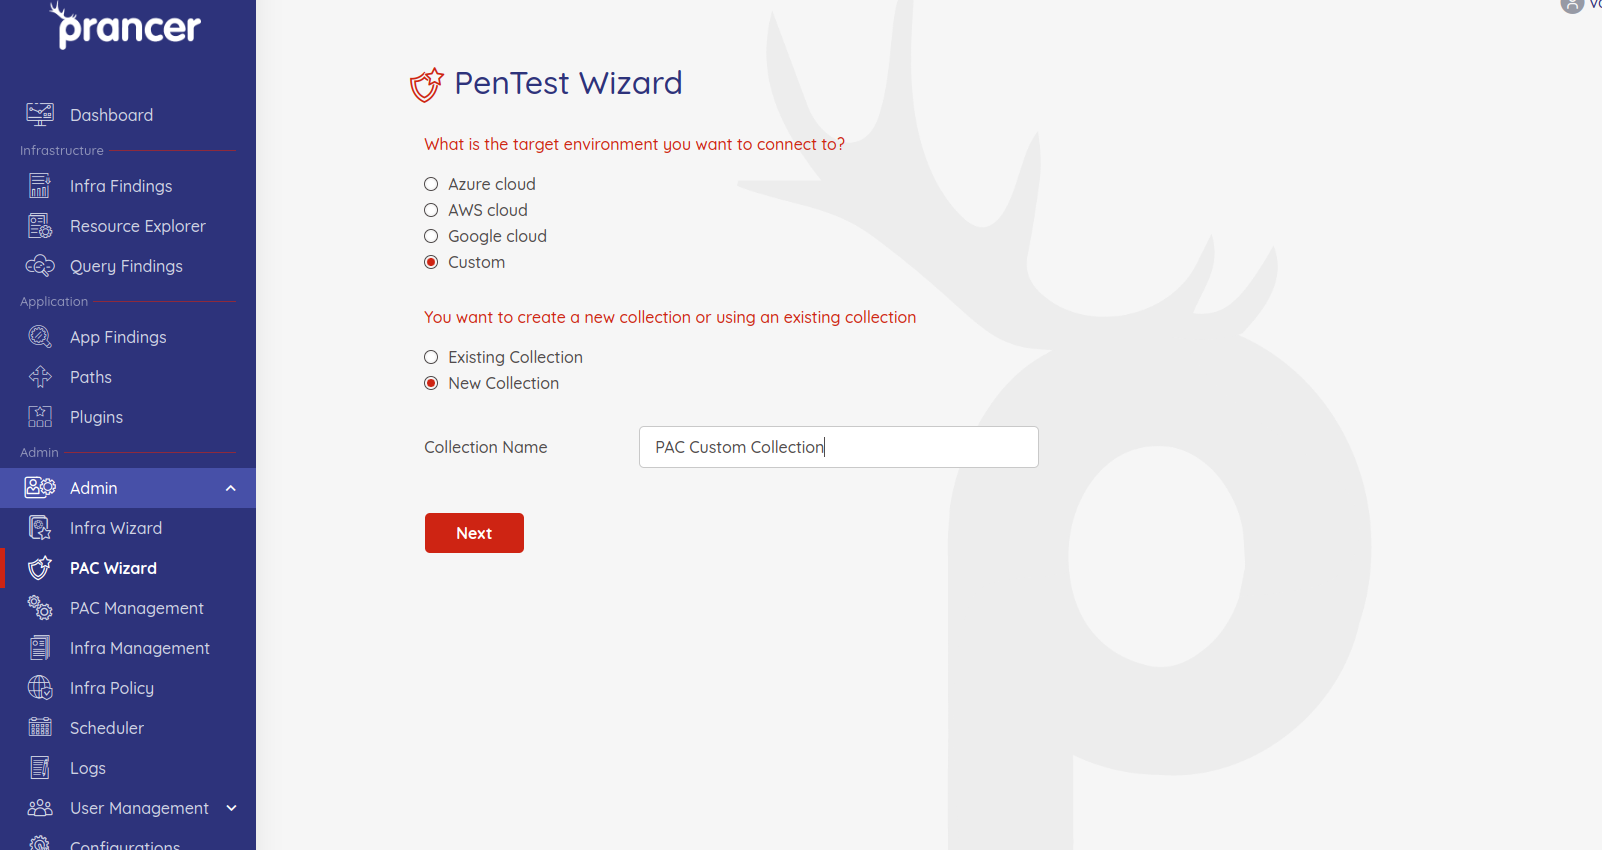
Choose Custom and enter a collection name.
Step 2 — Application information
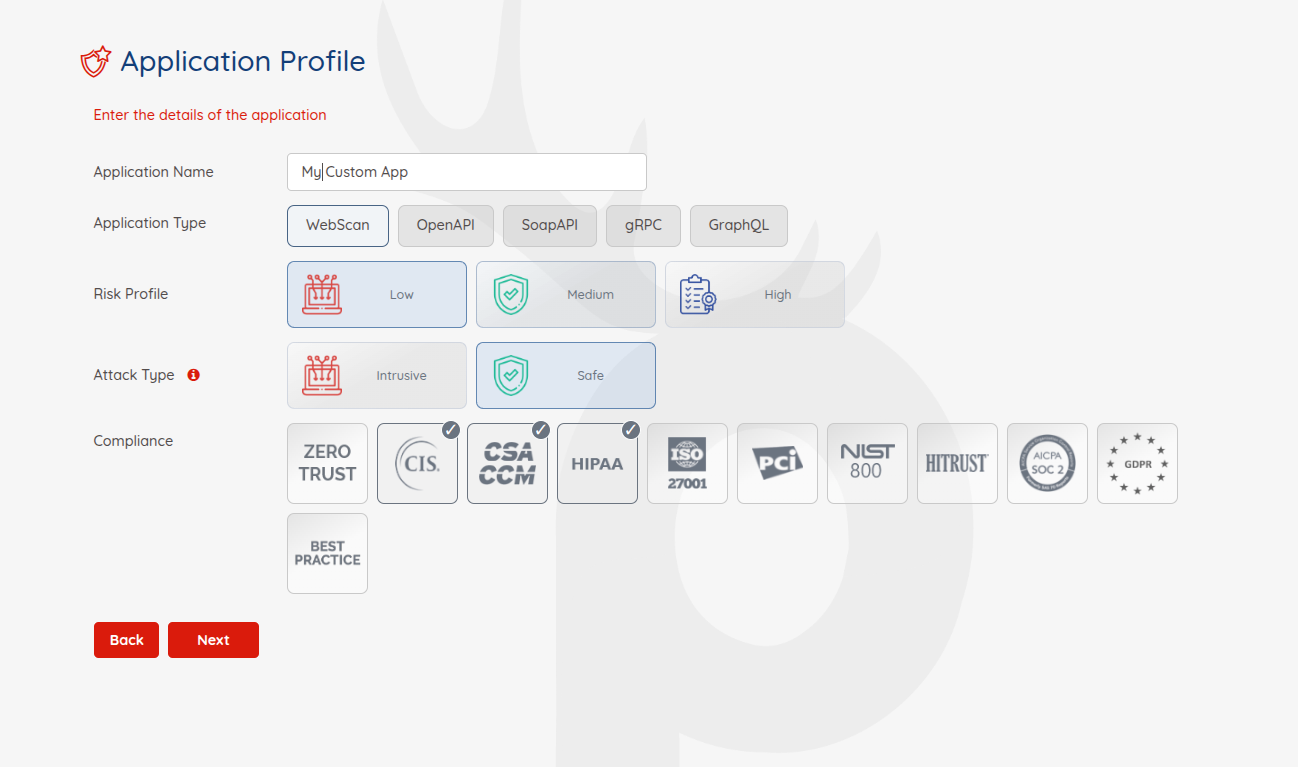
| Field | Notes |
| ------- | ------- |
| Application Name | Identifier. |
| Application Type | Web, Open API, SOAP. |
| Risk Level | Safe (production-safe), Attack (active payloads), Standard (both). |
| Compliance | Used to filter findings later. |
Step 3 — Scanner & target
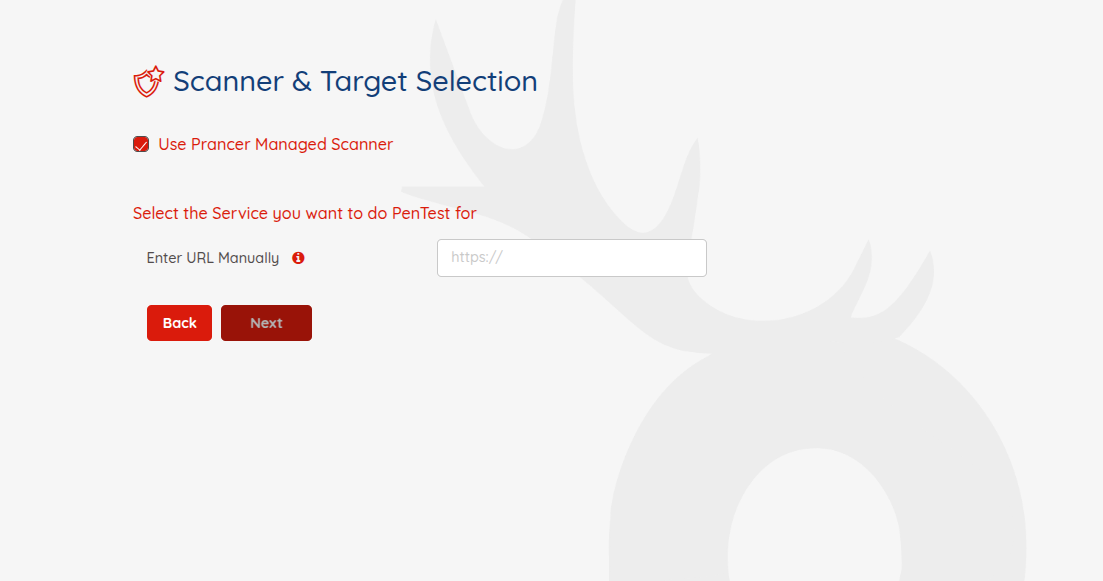
Enter the target URL. There's no cloud scanner to provision here — execution happens wherever you run the CLI.
Step 4 — Authentication
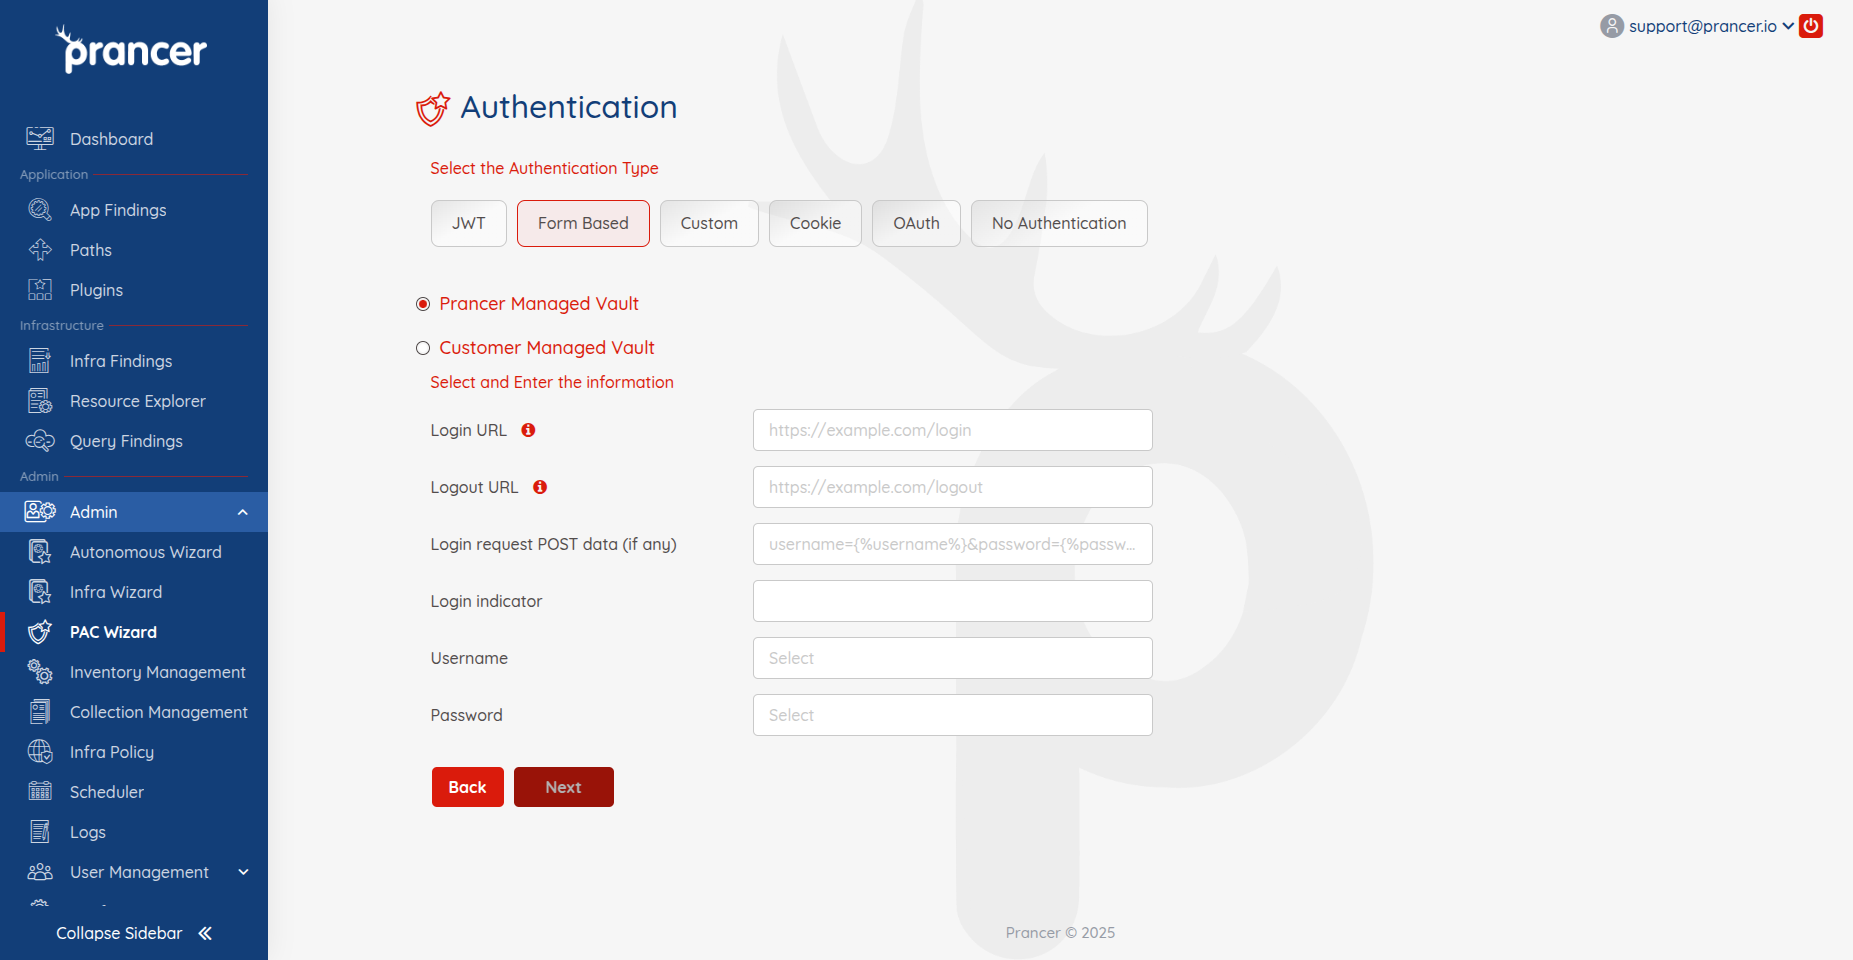
Pick an auth method and fill in the fields. See dedicated guides: Form-Based · JWT · OAuth · Cookie · Custom.
Step 5 — Review and submit
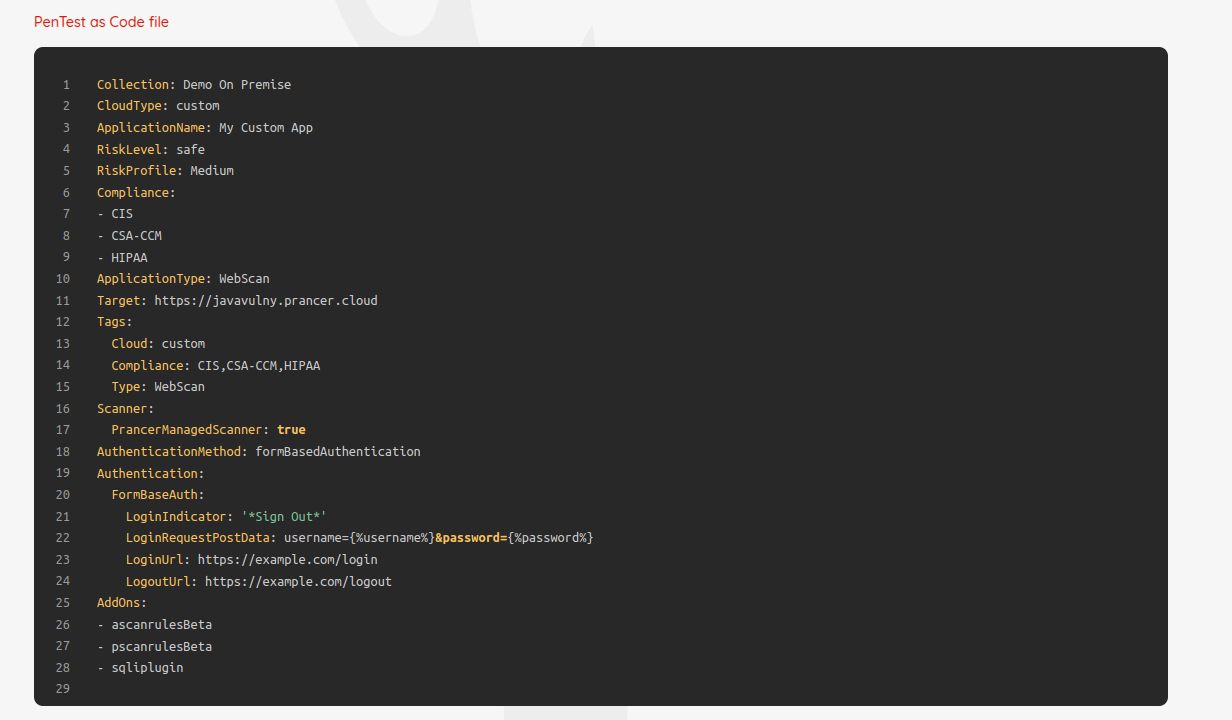
Review the manifest and click Submit.
Next steps
Run the manifest from your machine or pipeline using the PAC CLI — pass the Configuration ID shown in PAC Management as --config.
Note: because there's no cloud scanner, you're responsible for the network path between your runner and the target.