Documentation / Pentesting as Code (PAC)
PAC through GitHub
Run a Scan from a PAC File in GitHub
Skip the wizard and store your PAC manifest in your own Git repo. Prancer pulls the file at scan time so you can version-control it, code-review it, and iterate fast.
Tip: this is the right approach if your team already runs everything as code. Use the PAC Wizard for one-off setups or when you don't yet know what should be in the file.
Before you start
- A Git repo (GitHub, GitLab, Bitbucket) where you'll keep the PAC file.
- *(Private repos)* a Personal Access Token with read access — store it in the Vault.
- A working knowledge of PAC file structure.
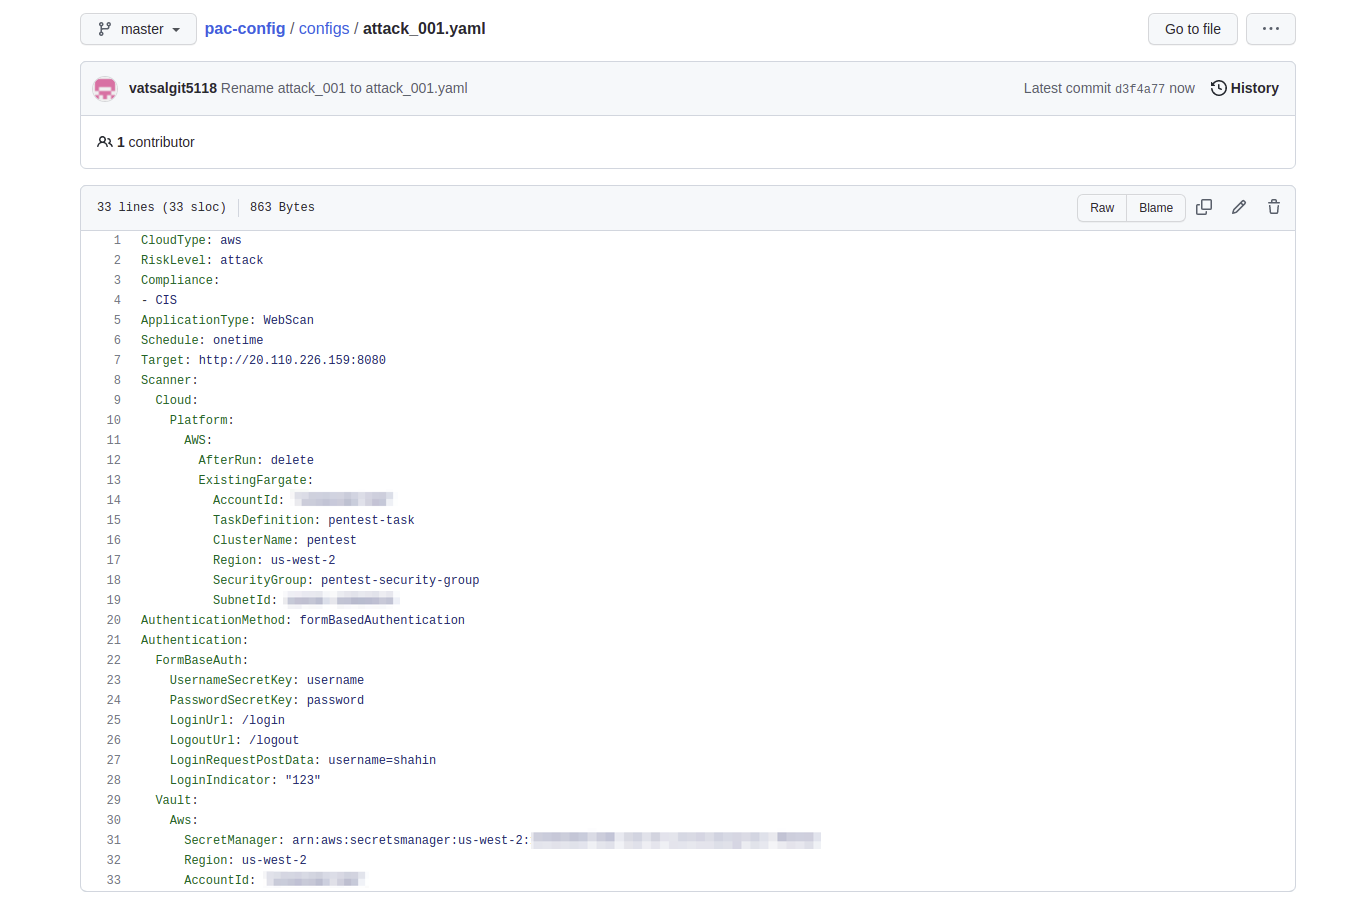
Step 1 — Push the PAC file to GitHub
Create your PAC YAML and commit it.
Step 2 — Create a collection in the wizard
In the PAC Wizard, follow Step 1 and Step 2 only — set up the connector and the application info.
Note: you stop after Step 2 because the rest of the configuration lives in your remote PAC file.
Step 3 — Add a Git connector
Add a Git connector pointing at your PAC repo. Full setup: PAC file on Git.
{
  "branchName": "master",
  "companyName": "prancer-CompanyName",
  "fileType": "structure",
  "gitProvider": "https://github.com/<User>/pac-config.git",
  "private": false,
  "type": "filesystem"
}
Step 4 — Required PAC file fields
Your PAC file must contain at least:
| Field | What it holds |
| ------- | -------------- |
| Collection | Collection name created in Step 2. |
| ConnectionName | Connector name from Step 2. |
| CloudType | Cloud provider used for the scanner. |
| ApplicationName | Identifier for this app. |
Step 5 — Add the remote-file references
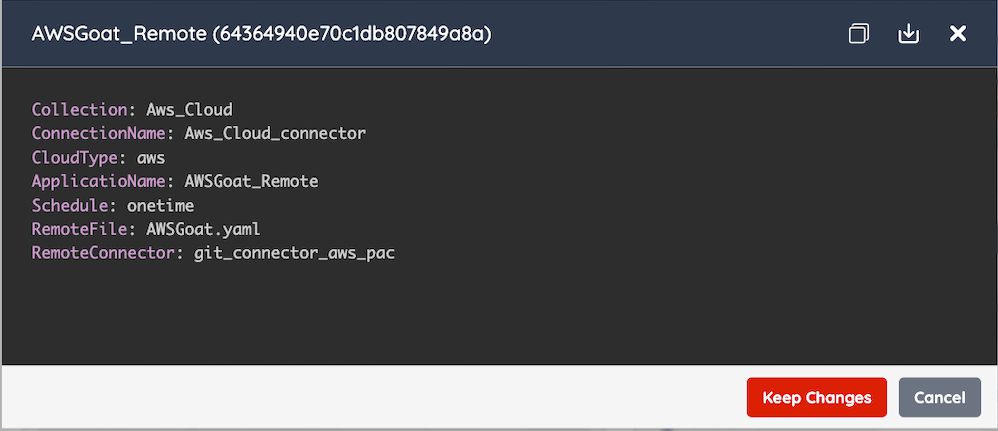
Tell Prancer where to find your PAC file:
| Field | What it holds |
| ------- | -------------- |
| RemoteConnector | Name of the Git connector created in Step 3. |
| RemoteFile | Path to the PAC file inside the repo. |
The final PAC file looks like:
Next steps
- Trigger the scan from PAC Management or via the PAC CLI.
- Use Custom Add-ons to layer your own attacks on top.