Documentation / Home
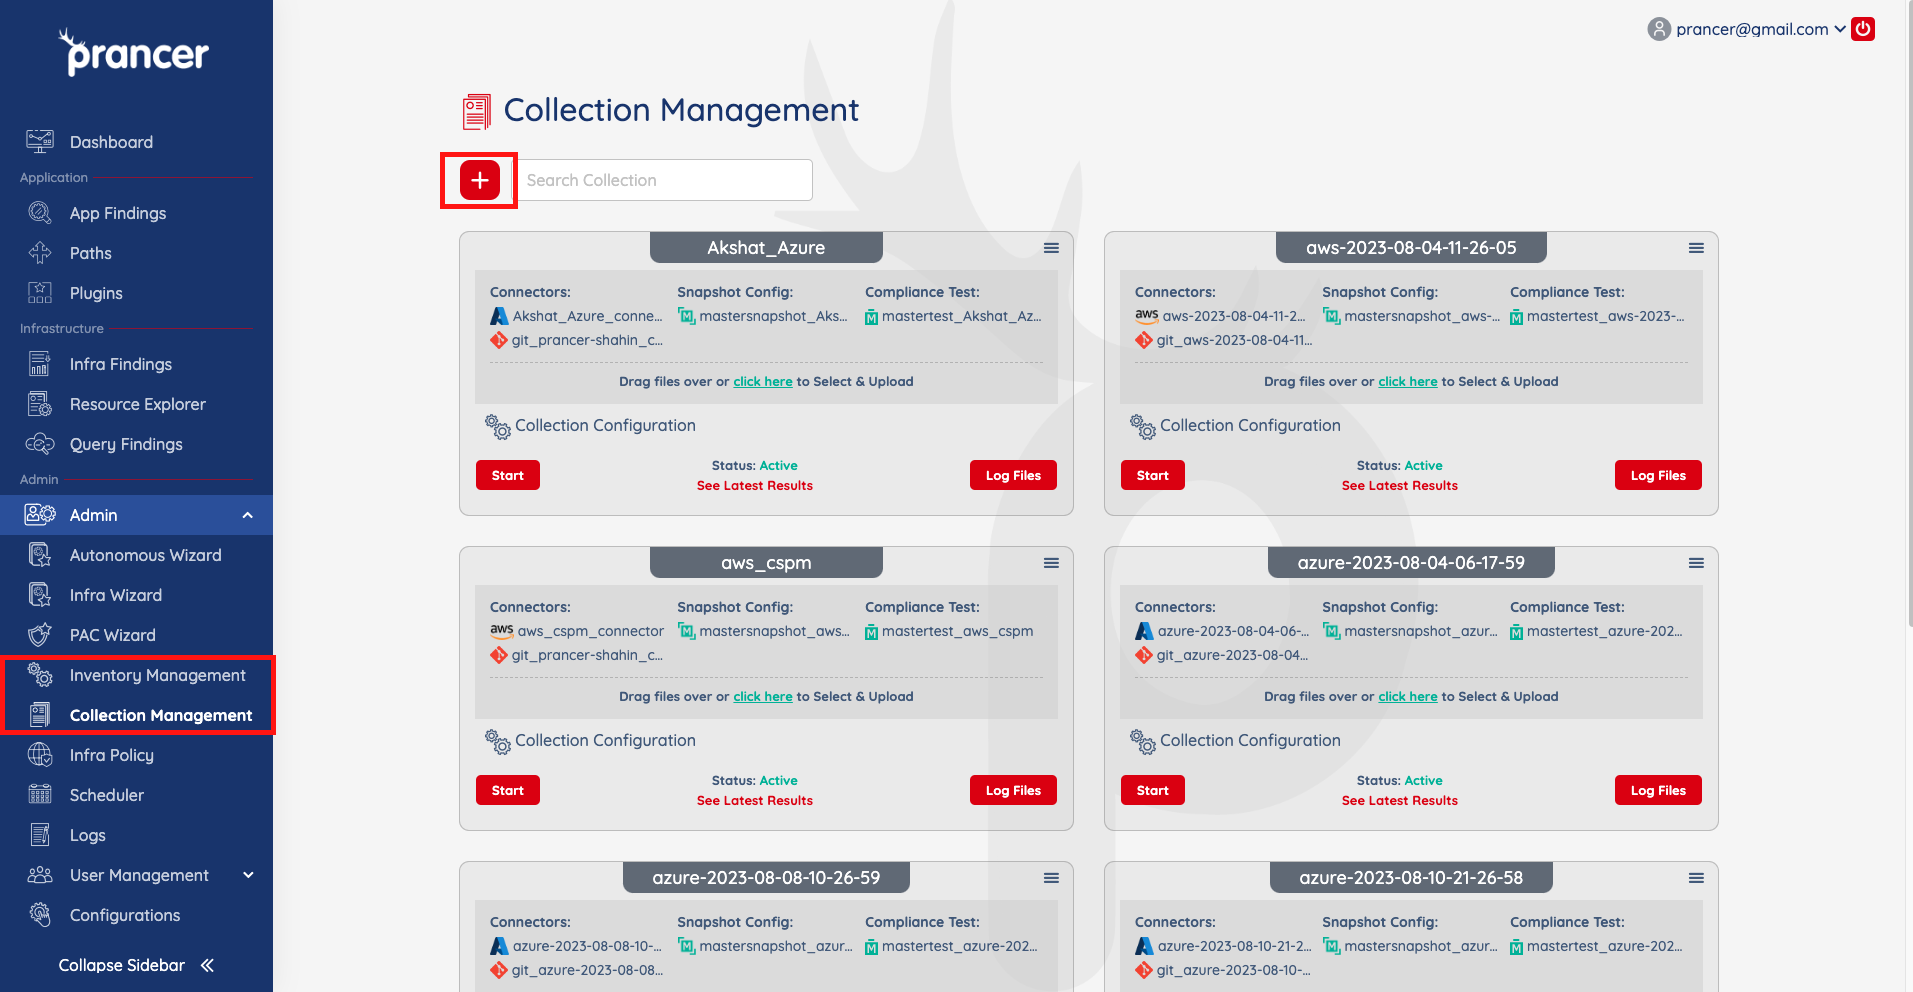
Collection Managment
Collections
A collection is a container for everything related to a scan: connector configs, snapshots, compliance files, and findings. Use collections to keep environments (prod / staging), business units, or applications tidy and isolated.
- On the Collection Management page a collection holds infrastructure connection details.
- On the Inventory Management page a collection holds the full set of inputs needed for a PAC scan.
Before you start
- You're logged into the portal.
- You know which environment, app, or business unit this collection represents — name it accordingly.
Create a collection
1. Open Collection Management *(infrastructure)* or Inventory Management *(PAC)*. 2. Click the + button. 3. Enter a Collection Name and click Create.
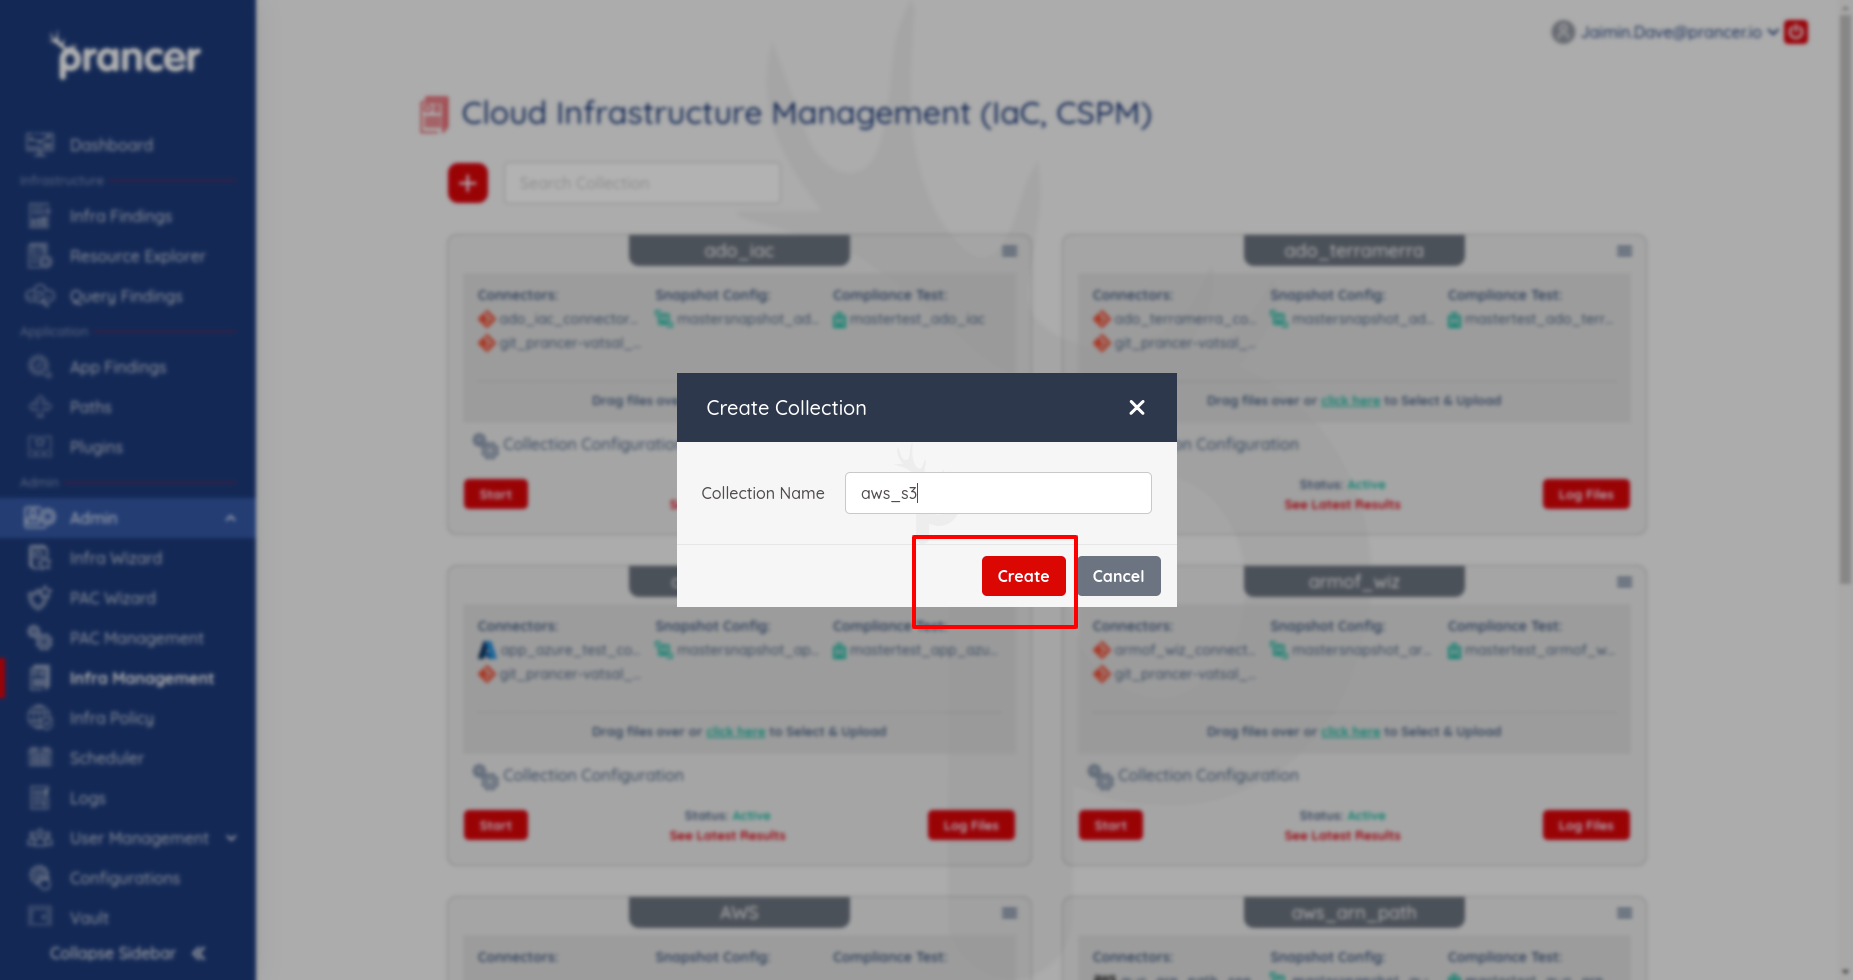
Tip: use a consistent naming convention likeprod-paymentsorstaging-azure-eastus— collections are sorted alphabetically.
Upload files
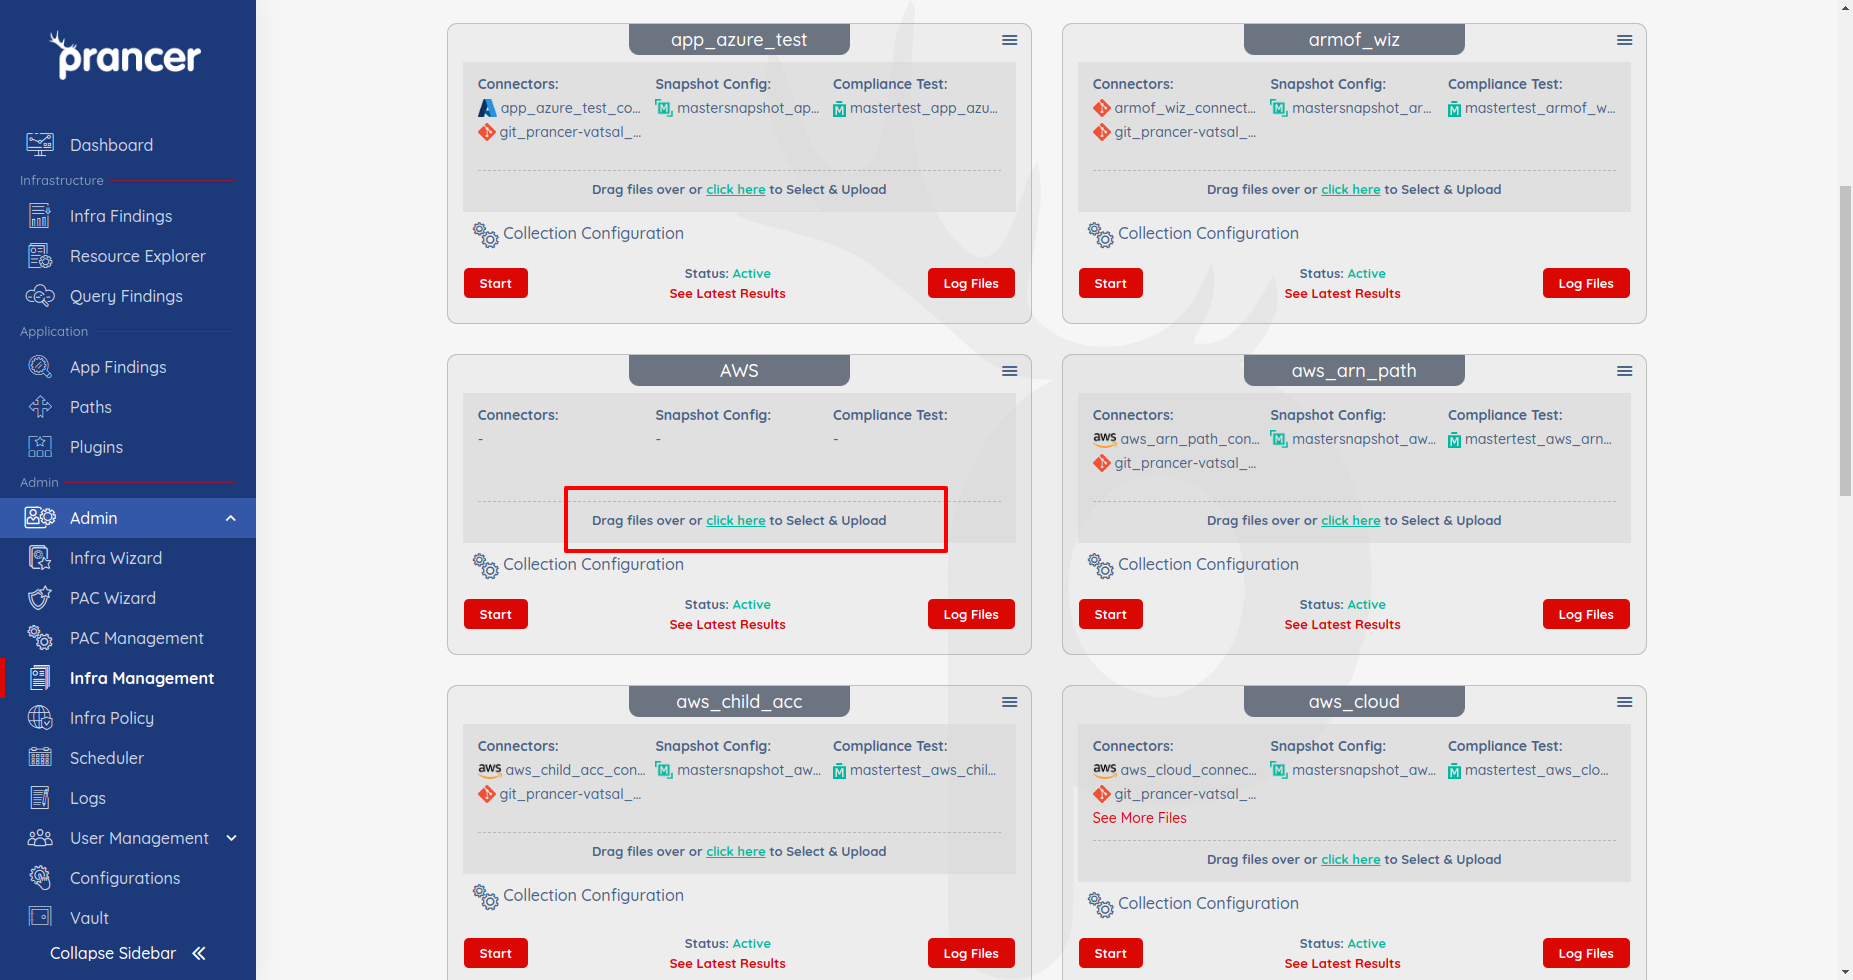
Upload .rego policies and other configuration files by drag-and-drop or by clicking Click here. Multiple files at once are supported.
!Uploading files to a collection
View collection contents
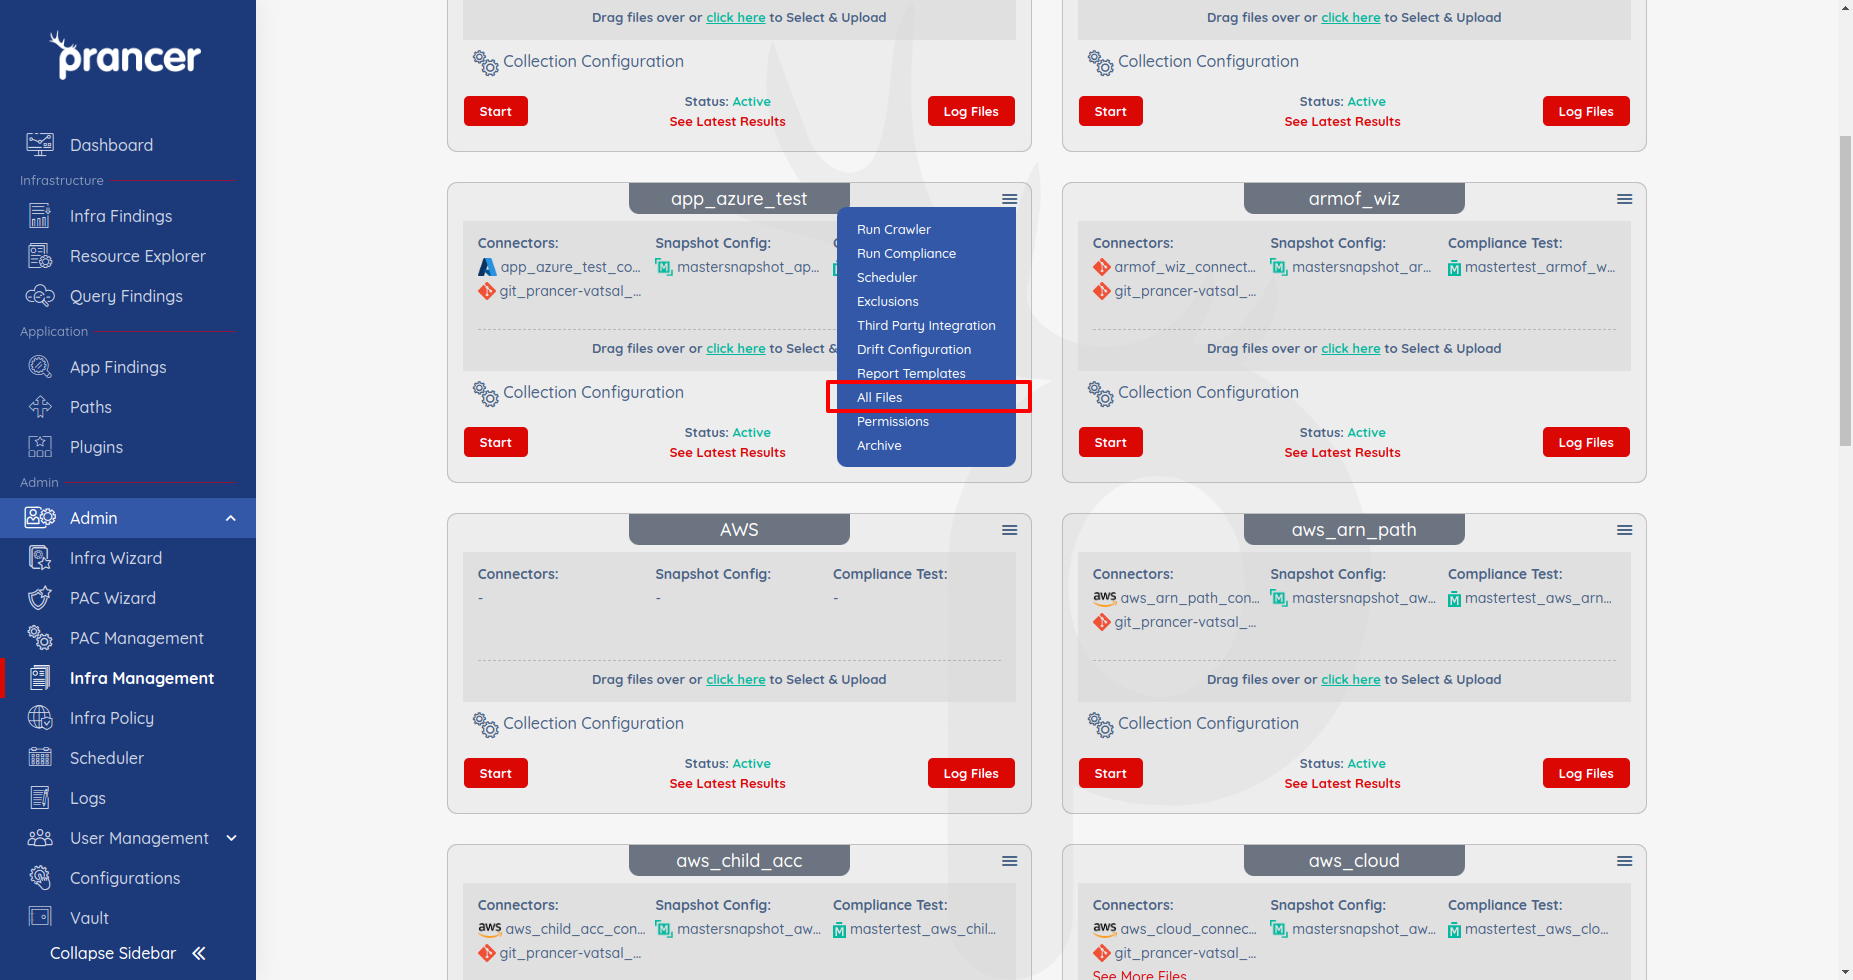
Open the collection menu (the dropdown next to its name) and choose All files.
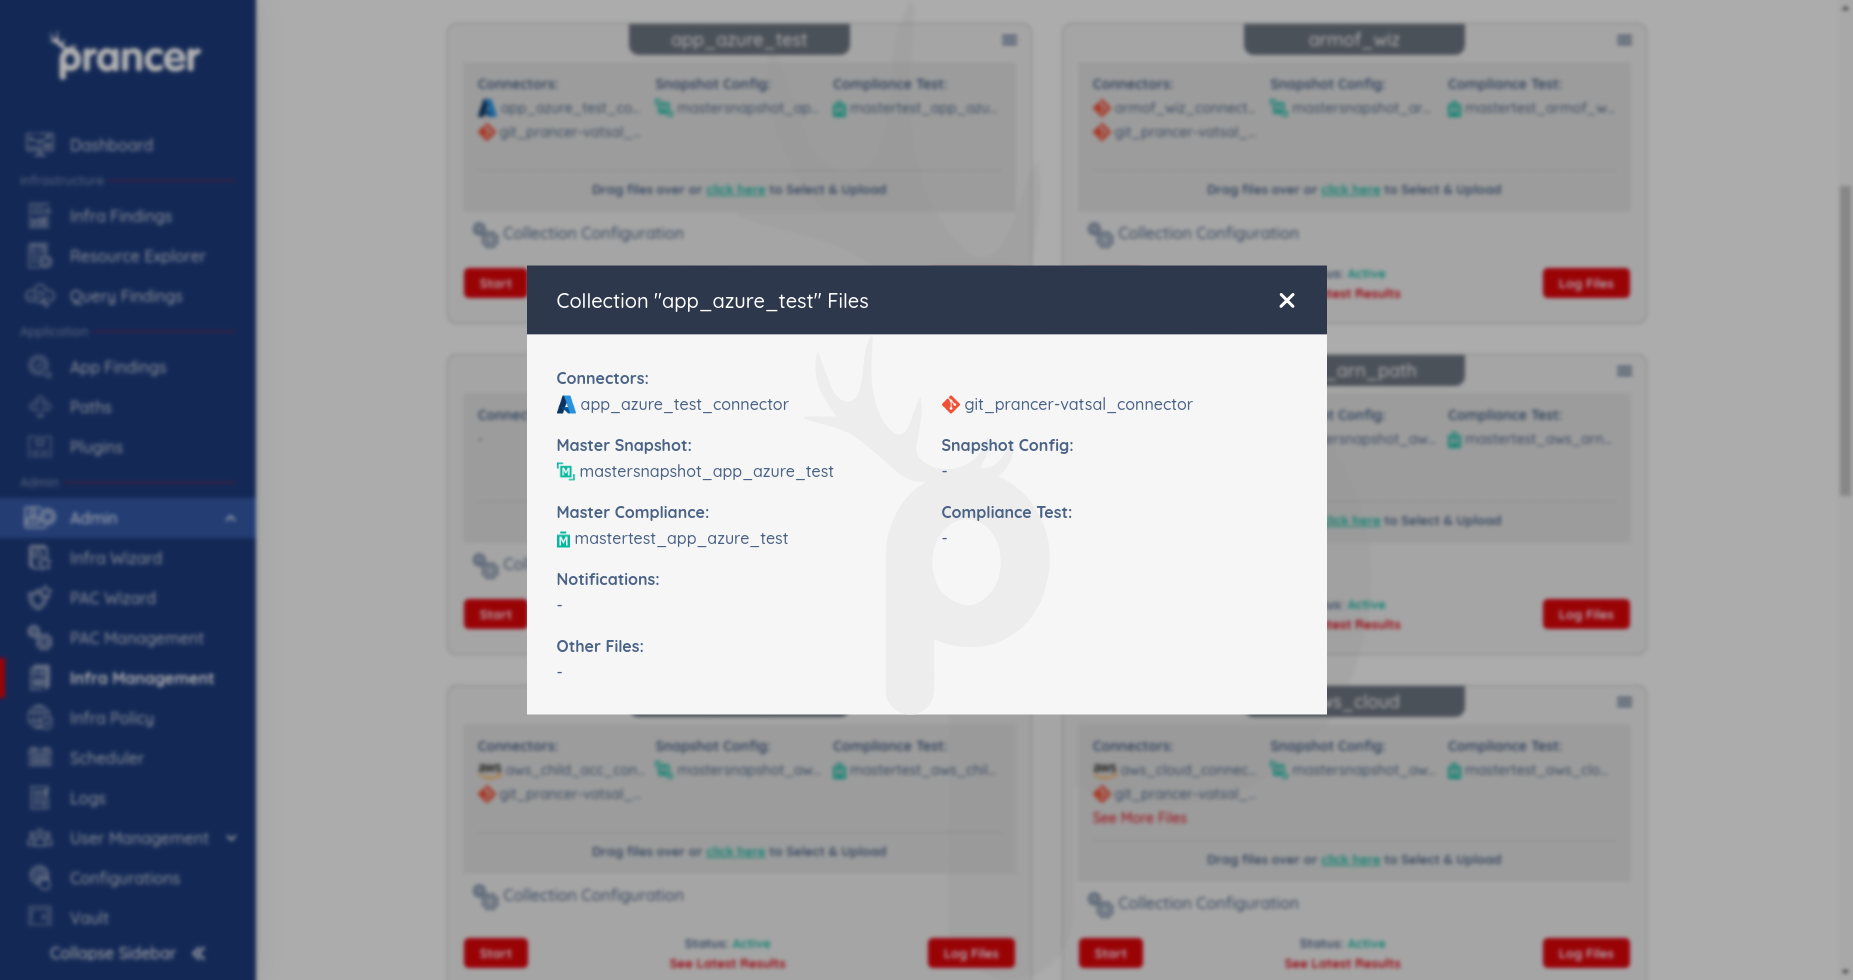
A collection can hold:
- Master Snapshot — top-level snapshot definition.
- Snapshot Config — generated snapshots.
- Master Compliance — top-level compliance suite.
- Compliance Test — generated tests.
- Notifications — third-party push targets.
- Other Files —
.rego, JSON, etc.
Click any file to view or edit its details.
Delete vs. archive
Warning: deleting a collection removes its files and findings history. Use this only for collections created by mistake.
| Action | When to use |
| -------- | ------------- |
| Delete | Collection has no findings — created in error. |
| Archive | Collection has findings — keep history but hide it from active dashboards. |
Archived collections don't appear on the findings page.
Bulk authentication for all assets
If every app in a collection uses the same auth, configure it once at the collection level.
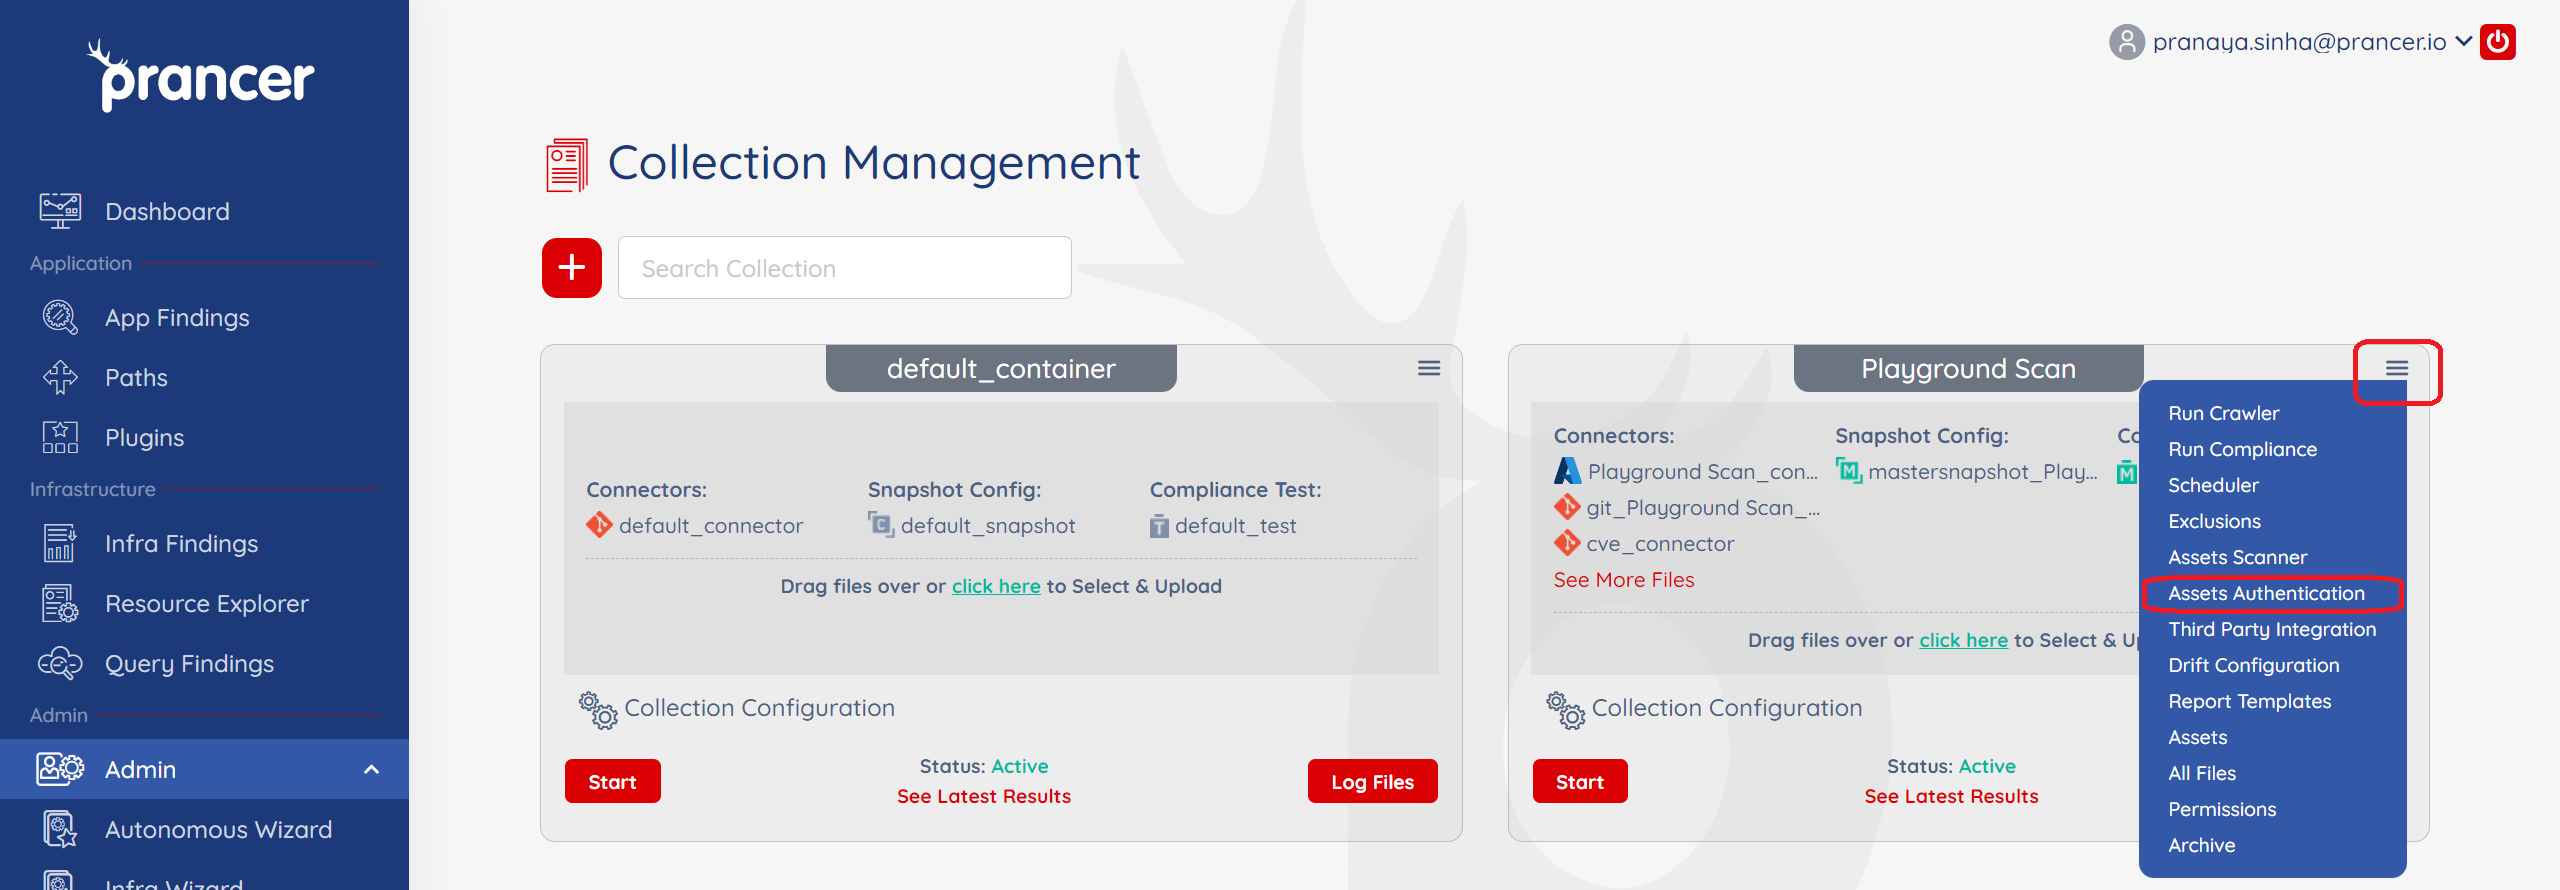
1. On Collection Management, click the hamburger menu and pick Asset Authentication.
!Asset Authentication menu item
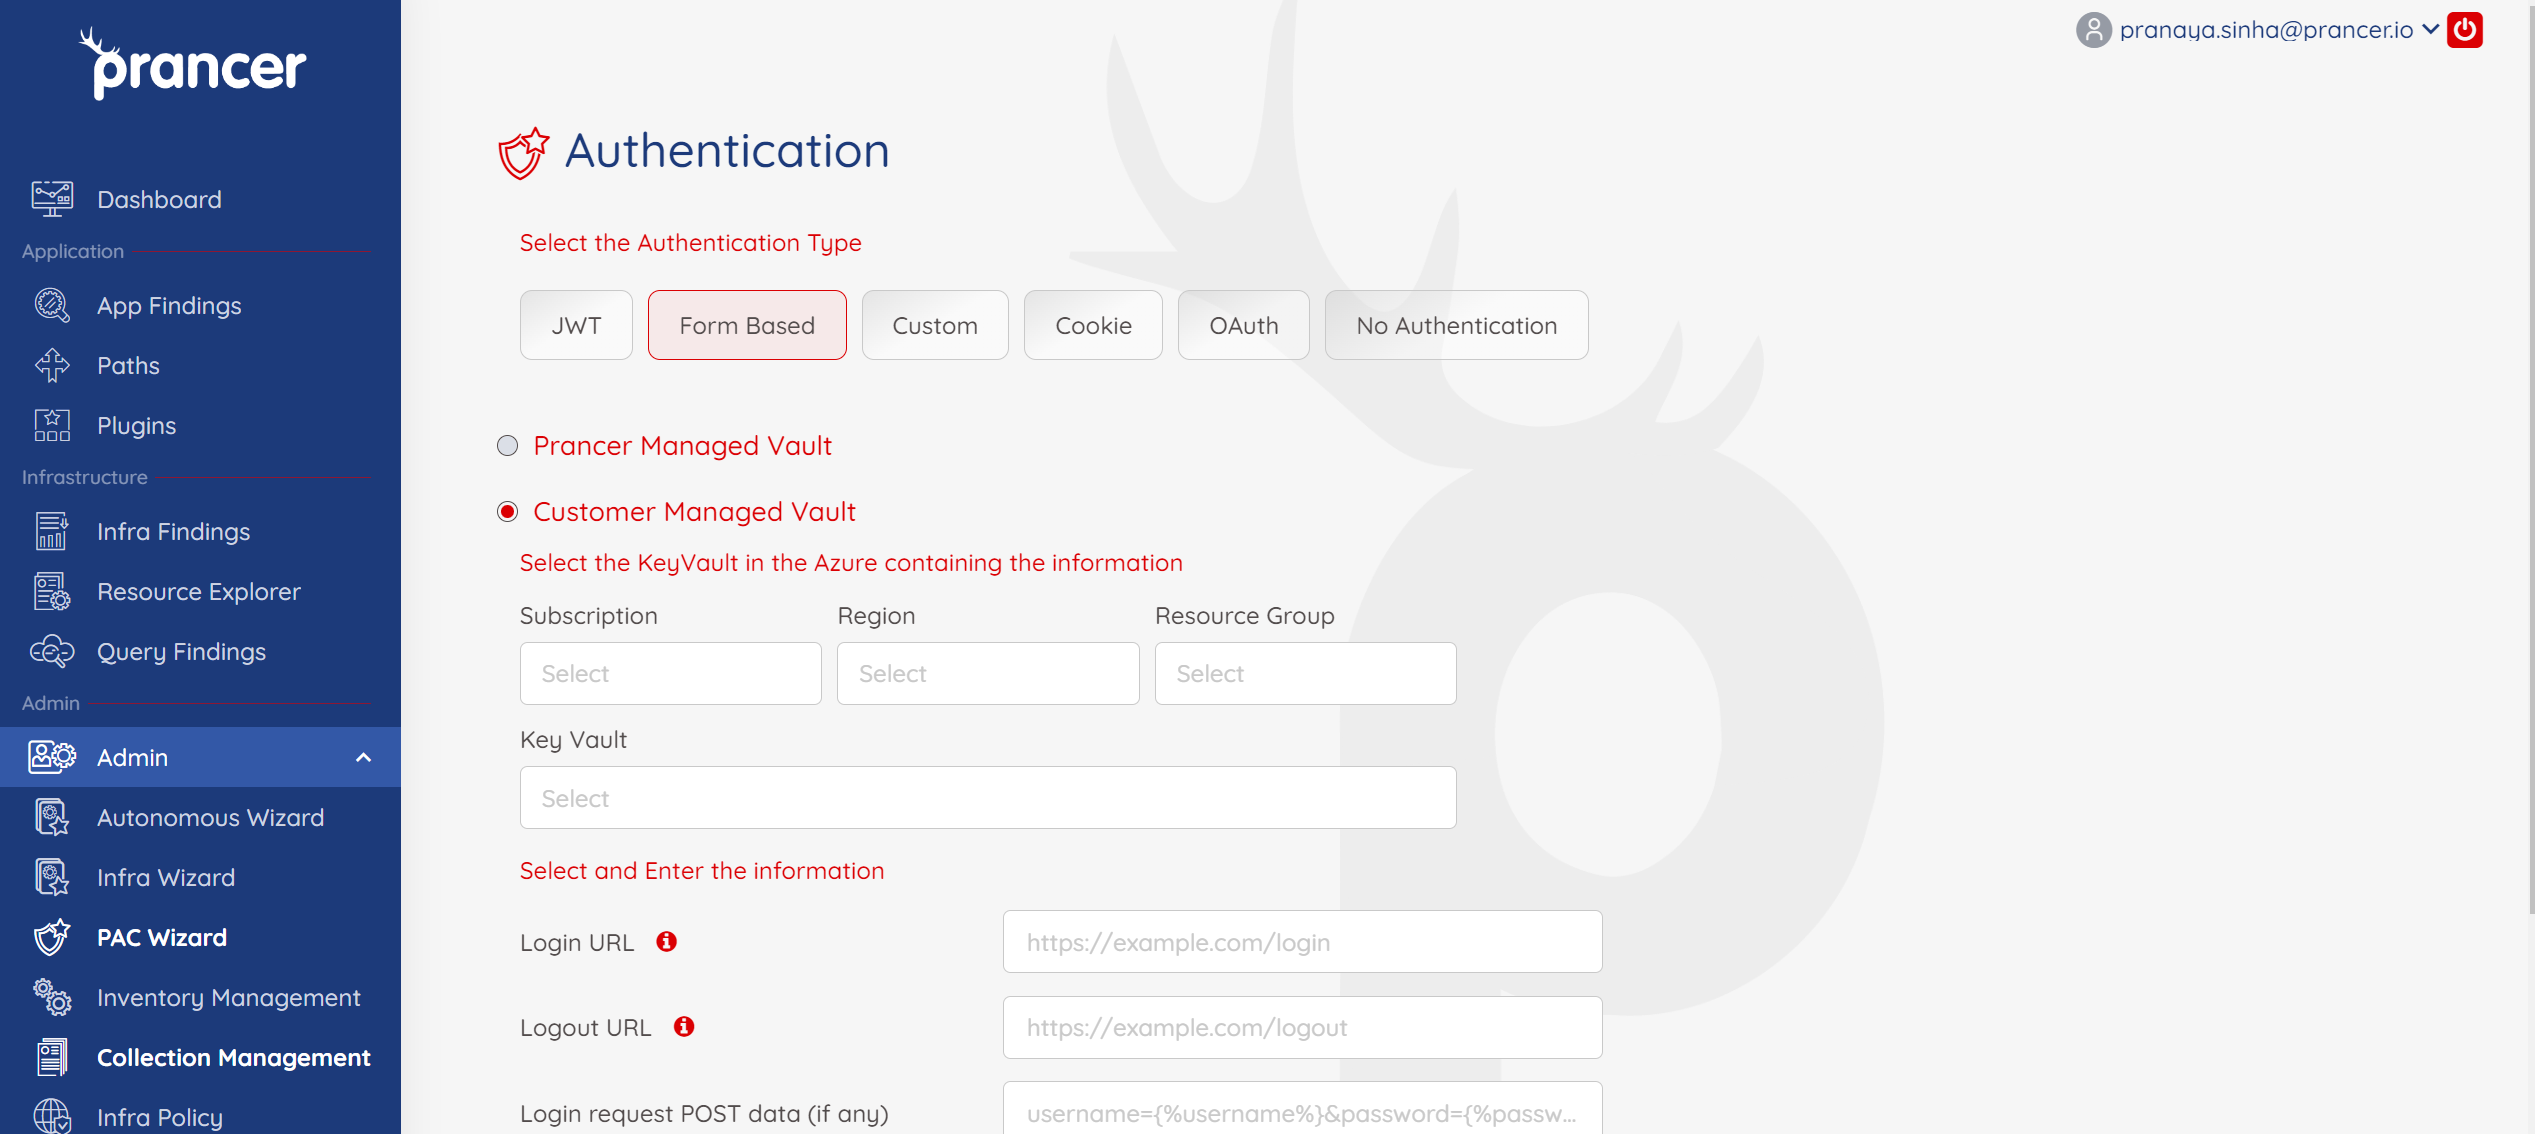
2. Pick the auth type and fill in the details:
!Filling in collection-wide auth
Bulk scanner for all assets
1. Click the hamburger menu and pick Asset Scanner.
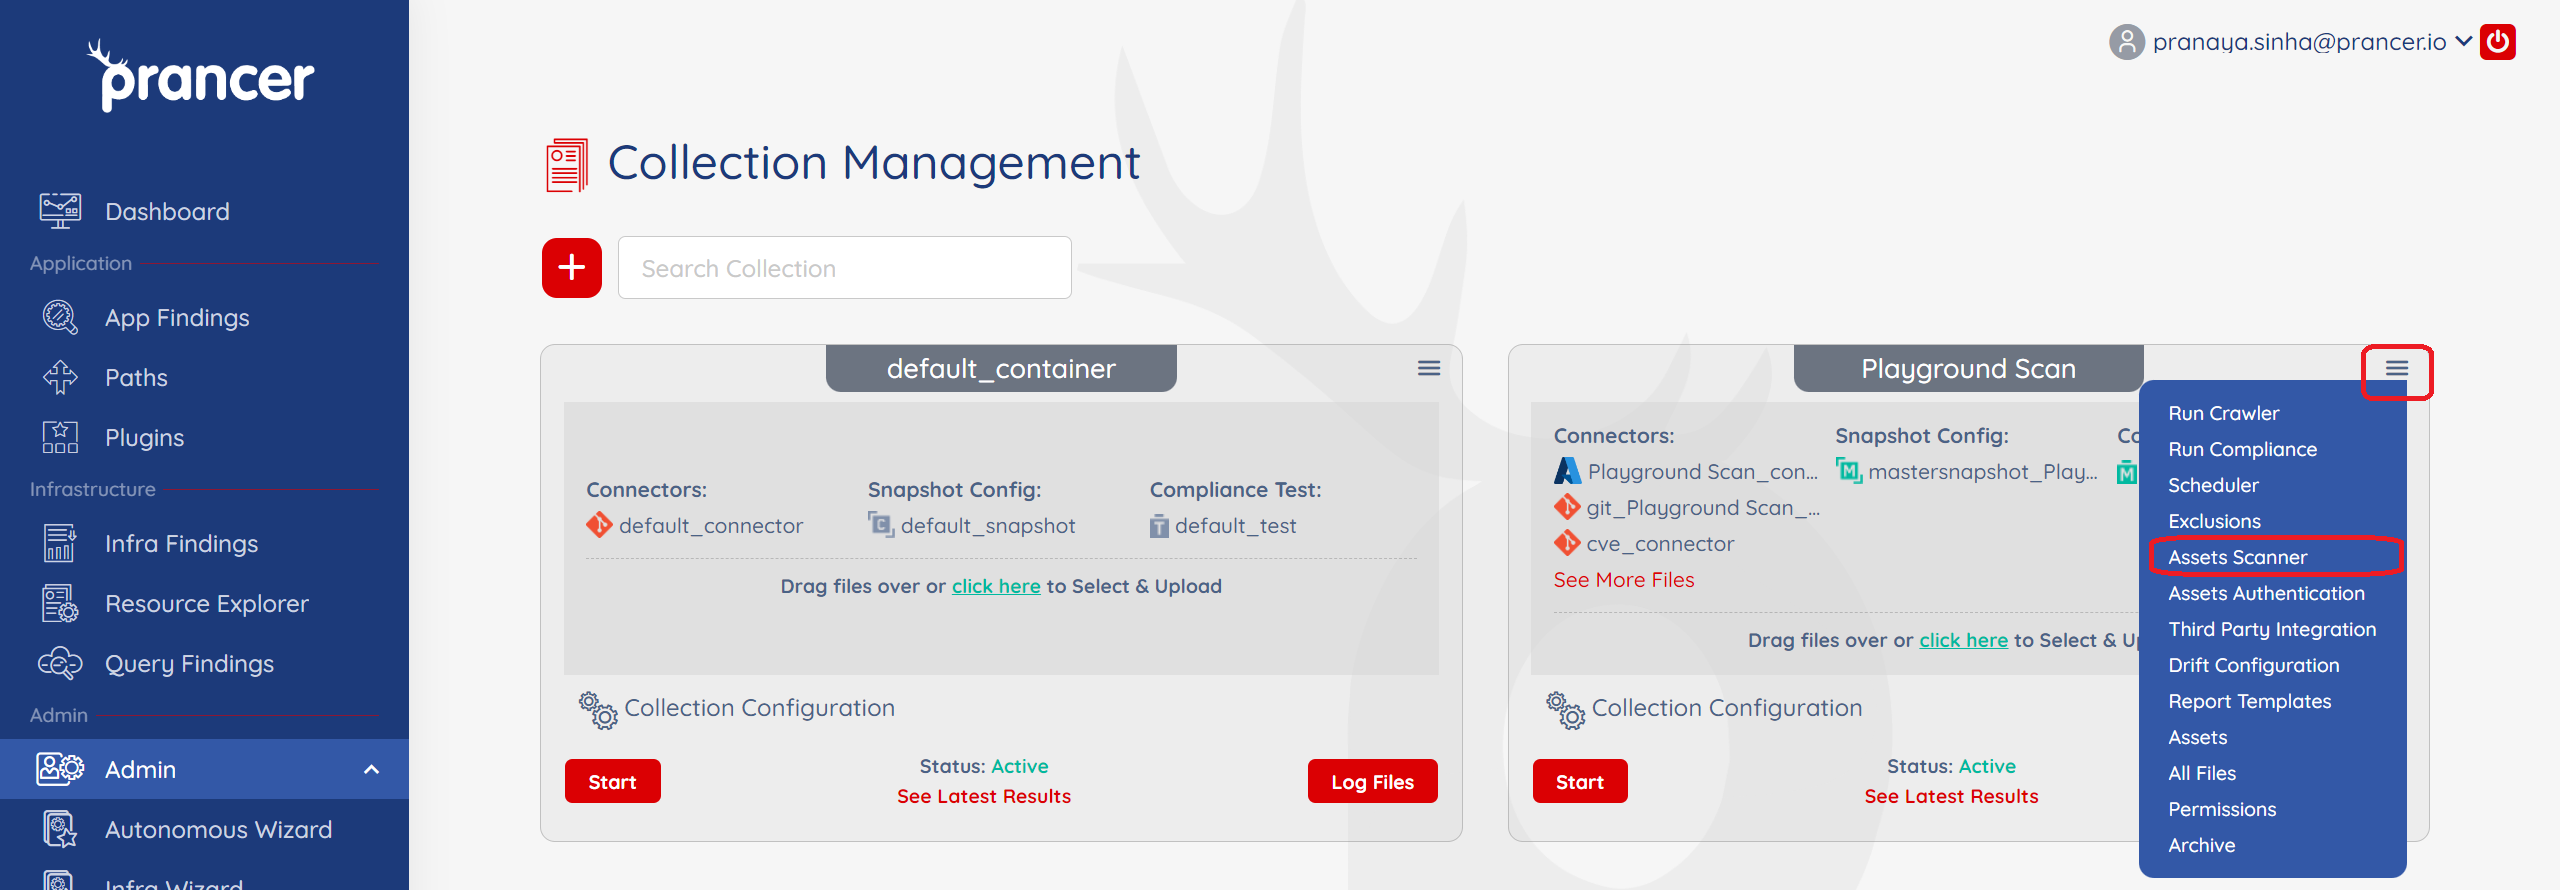
2. Configure the scanner — see Scanner Setup for details.
!Filling in collection-wide scanner